
Hi guys, so one of the problems with the digital age is having so much data stored here and there, especially media files, its always a pain when you have that favorite song on your computer at home and you can’t really access it or share with any other person from any other part of the house unless you come down to where its located. All of this particular kind of issues and other similar ones are what Plex tried to solve and for this tutorial, we will be installing the Plex server on your Raspberry Pi, giving you unlimited, not tethered connectivity to your media library.
Introduction to Plex Server:
Plex is a client-server media player system, which has a Plex Server to serve all the media files and a Plex Client to access or stream all the media files from the server.
- The Plex Media Server can be run on many Operating Systems like Windows, macOS and Linux etc. Plex organize all you media files, whether it be music, movies, photos, shows, in clean manner with posters and thumbnails and also show ratings and other things from the online services. Here we are using Raspberry Pi as Plex Server.
- Media players are the clients running on the client devices like mobile, computer etc. Clients can access the media files from the Plex Server.
The Plex Home Media Server allows you to keep all your media files in one place and access them from any and all of your other devices. You can access the data from all your favorite devices like Web, Android Smart phone, Apple, Amazon fire TV, iOS, Windows, Xbox, PlayStation, Chromecast, Smart TVs etc. Plex Client is supported for all of these devices.
For this tutorial, we will be creating the Plex server on Rasbperry Pi. You will be able to upload your media files to the attached storage (USB pen drive or External HD) and then stream the media from the server to any other device, be it mobile phone, or connected computer. This could be a very useful tool as it helps you manage the space on all of your other devices quite well and makes sharing with friends and family easy.
Required Components:
- Raspberry Pi 3 (should work fine with Pi 2)
- SD card (at least 8GB)
- USB Drive or External Hard disk (Optional)
In this raspberry pi plex server tutorial we are using Raspberry Pi 3 with Raspbian Jessie OS. All the basic Hardware and Software requirements are previously discussed, you can look it up in the Raspberry Pi Introduction.
So here I am assuming that you are familiar with setting up the Raspberry Pi and you know how to access your Raspberry Pi via terminal using software like putty. Lot of assumptions right? Yea but those are pretty basic stuffs which you can learn from our previous Raspberry Pi projects.
We will take implementing the Plex server on Raspberry Pi in steps, follow them carefully and the project will work like a charm. Lets dive in!
Setting up Plex Server on Raspberry Pi:
Step 1: Upgrading the Pi
The first thing I like doing before starting every project is updating the pi, to get every latest update to the OS in. we do that using;
sudo apt-get update
sudo apt-get upgrade
With this done, reboot the pi using;
sudo reboot
Wait for a while, then restart the terminal session and continue to step 2.
Step 2: Static IP Address for the Pi
The next thing we need to do is to assign a static IP address to our raspberry pi.
First thing we need to do is be sure of the current IP address. This can be done using;
sudo hostname -I
This will display the current IP address. Copy and keep safe.
Next, we edit the cmdline.txt file of the raspberry pi to include the IP address.
sudo nano /boot/cmdline.txt
Add the below line at the end of the file, replace "IP_ADDRESS" with your IP address"
ip=IP_ADDRESS
Reboot the raspberry pi to effect changes.
sudo reboot
Step 3: Install HTTPS transport package
Next thing for us is to install (or confirm that we have installed) the HTTPS transport. This though comes with newer version of the raspbian and its needed to be able to access the https packages via apt-get.
sudo apt-get install apt-transport-https
This will install the latest version. If you already have it, you’ll just get a message kicked back telling you so. Either way, you’re now ready for the next step.
Step 4: Get the dev2day repository
The next thing we need to do is get the dev2day repository (A project documentation on plex) which contains Plex but to do this we need a crypt O key for the dev2day website.
To get the crypt O key;
wget -O – https://dev2day.de/pms/dev2day-pms.gpg.key | sudo apt-key add -
dont forget the – at the end.
You may encounter a problem at this stage where the terminal will return something like this;
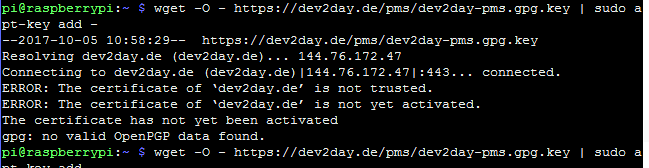
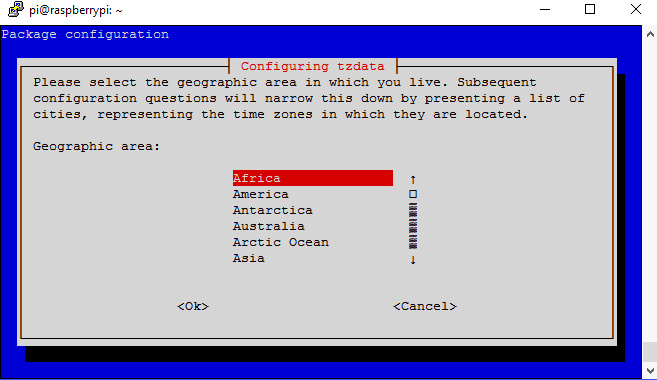
This problem is associated with your pi having a wrong time and date. To fix this, run;
sudo dpkg-reconfigure tzdata
Then select your timezone, and closest city
Then use the line illustrated below to set the exact time.
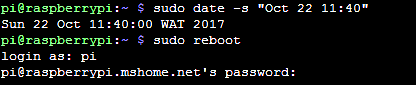
Reboot the Pi and run the command to get the crypt 0 key again.
All done? Next, we’ll add dev2day’s repository to the package source list.
echo “deb https://dev2day.de/pms/ jessie main ” | sudo tee /etc/apt/sources.list.d/pms.list
It will just return a line with the echoed input.
Finally, update the package list using;
sudo apt-get update
Reboot the pi and move on to the next step when it comes back on.
sudo reboot
Step 5: Install Plex Media Server
With the device back on, we are finally ready to install Plex!. To do this we use the command;
sudo apt-get install -t jessie plexmediaserver
Reply yes (by pressing y) if it asks for your permission to install any dependency.
Step 6: Setup Plex to run on the ‘Pi’ user
Next thing we need to do is setup Plex to run on the ‘Pi’ user with which we are logged in. To do this, we need to edit the plexmediaserver.prev file and change the user from plex to pi. To do this we use
sudo nano /etc/default/plexmediaserver.prev
This will open up a text file. We are looking for the part of the text file that says
PLEX_MEDIA_SERVER_USER=plex
We will change it so it becomes;
PLEX_MEDIA_SERVER_USER=pi.

Save the text file as usual and exit using CTRL+X and then y.
With this done, restart your plex server to effect changes using;
sudo service plexmediaserver restart
with this done, reboot your pi once again as we effect the final changes.
sudo reboot
Thats it guys, we have Plex server all set up and running on our Raspberry Pi, but i’d say the server is useless if we don’t load files on it right? So the next few steps will be about showing us how to load files in and also stream the files from connected devices.
Step 7: Upload the files on Plex Server
The step will show you how to populate your Plex media server.
The first thing is to connect a usb drive or an external hard disk containing the media files with which you want to populate the server to your Pi.
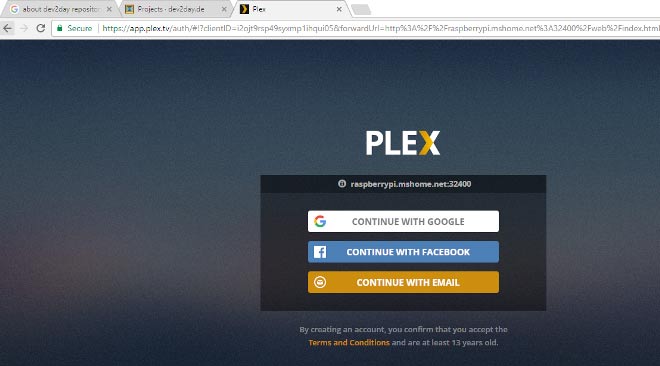
With this done, we open a web browser and go to;
MyPiIPAdress:32400/web/
OR
raspberrypi.mshome.net:32400/web/
This will bring you to the plex web app, sign in or create an account.
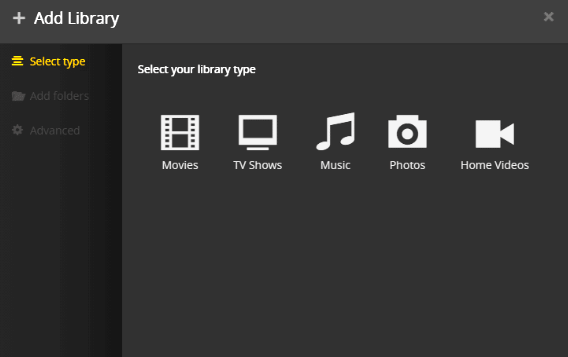
Plex will show you how things work and you will see how to add library. Navigate through your folder, select the right type of file and add them to your Plex library.
That’s all, you can now easily connect any client device on the same network, and Plex will connect it to your server.
Step 7: Access the files from Plex Client
To do this you will need to install and open the Plex app from a client device and if they are on the same network, it will work like a charm. As mentioned already Plex Client can be anything like your Mobile Phone, Computer, Smart TV, Playstation etc.

That’s it guys, let me know if you have any questions.
Comments
install fails
I get stuck on:
Extracting readynas.deb ...
Synchronizing state for plexmediaserver.service with sysvinit using update-rc.d...
Executing /usr/sbin/update-rc.d plexmediaserver defaults
insserv: warning: current start runlevel(s) (empty) of script `plexmediaserver' overrides LSB defaults (2 3 4 5).
insserv: warning: current stop runlevel(s) (0 1 2 3 4 5 6) of script `plexmediaserver' overrides LSB defaults (0 1 6).
Executing /usr/sbin/update-rc.d plexmediaserver enable
Failed to execute operation: Connection timed out
every time. Any ideas?

When I've entered : echo “deb https://dev2day.de/pms/ jessie main ” | sudo tee/etc/apt/sources.list.d/pms.list
I got this error : sudo: tee/etc/apt/sources.list.d/pms.list: command not found
I think the command should be something like (with a space after the tee) : echo "deb https://dev2day.de/pms/ jessie main" | sudo tee /etc/apt/sources.list.d/pms.list