
Doorbell is a very common and useful device used in every household. Among electronics students and hobbyists, doorbell circuit project is quite popular. So in this tutorial we are going to build a doorbell with 555 timer IC. The main feature of this doorbell is that we can control the time duration for which it keeps ringing upon pressing the switch. Also we can control the oscillation frequency of “doorbell sound” sound produced by the Doorbell (Here we are using Buzzer as bell to illustrate).
Components
555 Timer IC – 2
Capacitors (1000uF, 1 uF)
Resistors (1k, 10k 100k) and Variable Resistor (10k)
Buzzer or Speaker
Push button Switch
Battery- 5- 9v
LED (Optional)
Working Explanation / Principal
Here we are using two 555 timer ICs, one to control the “ring duration” (how long it should ring on single button press), and other is to control the oscillation frequency of sound produced by bell. First IC will work in Monostable mode and second IC will work in Astable mode.
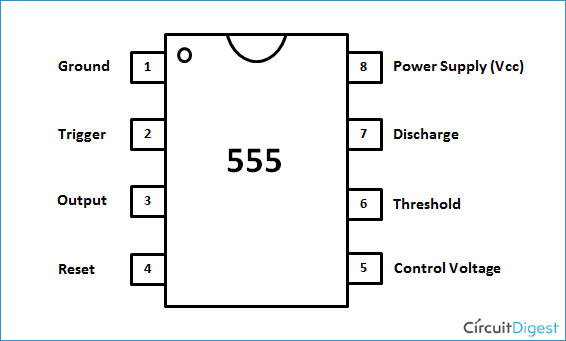
To control the “ring duration”, we connected the OUTPUT pin (3) of the first 555 Timer IC to the Reset pin (4) of the second 555 Timer IC. Means as long as the output pin of First IC will be high, Second 555 Timer IC will oscillate. Fourth Pin of the 555 Timer IC is the Reset pin, IC would only work if this pin is HIGH means connected to the positive voltage, if this pin is connected to the Ground, the IC will not work and changing/discharging of the capacitor will stops.
Circuit Diagram and Explanation

Above figure shows the circuit diagram for doorbell. Here we can see that First 555 timer IC is configured in Monostable mode, means it will go high and low only once if triggered with Trigger pin 2. Variable resistor RV1 is used to control the ring duration, means how long will be the output pin 3 will be high. 555 timer IC principal says that “Output PIN 3 will be HIGH as long as the capacitor (C1) will charge to 2/3 Vcc (battery voltage) and as soon as capacitor charges to 2/3 Vcc, Output pin 3 becomes LOW until the capacitor discharges to 1/3 Vcc”. This charging and discharging will happen once in Monostable mode. And it happens continuously in Astable mode. We can calculate the Ring duration (t) as follows:
t = 1.1*RV1*C1 seconds
We have also connected a LED at output of first IC, which will glow till doorbell ring.
Second 555 Time IC is configured in Astable mode which will oscillate till t seconds. Here we can also control the frequency by adjusting the value of R2 and/or capacitor C2.
Frequency =1/T= 1.44/((R1+R2*2)*C2)
TL (low time)= 0.693*R2*C2
TH (High Time )= 0.693*(R1+R2)*C2
D= Duty Cycle= (R1+R2)/(R1+2*R2) %
We have used 100k R2, but a variable resistor (100k or 1M) can also be used to instantaneous change the TL and TH.
Basically the main difference between Monostable and Astable 555 timer circuit configuration is that, in monostable, trigger pin 2 is trigger manually by a switch while in Astable trigger pin is automatically triggered when capacitor discharges to 1/3 Vcc. Also in Monostable mode, there is no resistor between PIN 6 and 7, while in Astable mode Resistor between 6 and 7 play a key role.
Pin 5 of the 555 Timer IC, should be connected to ground via .01uf capacitor when not used. Pin 5 is the control pin which is at the 2/3 Vcc. Pin 5 is the inverting end of comparator inside 555 Timer IC, which is used to compare the voltage with Threshold pin 6 (inverting end of comparator).
Comments
very use full for diploma students
Sir,
I tried the circuit twice and the problem which I faced was that the sound was generated before switching on( i.e., as soon as power supply was applied). I don"t know where i was going wrong. Can you please help me to debug my mistake.I haven't used 0.01 microfarad capacitor across pin 5 and ground.Circuit was rigged up according to circuit diagram shown.
Thank You.
i had the same problem and not only the buzzer but the LED aswell
Sir,
The problem which I faced was due to bad ICs (555). I got the output. Thank you for the circuit.
I've connected according to the circuit diagram but but it is not working, of course its works but before I switch on, where I'm suppose to be wrong...???
i whant to build this curcuit but i dont have 2 555 timers is it posible to make a simalir one with one ic
You can make with one 555, but then you are not able to control the duration of the Ring, means buzzer only beeps till the time the button is pressed.
i'm glad to be a partaker of this lucrative project.from NIGERIA
SIr
thanks a lot with this project, my problem is that my circuit sound without the ground, when if i connect the ground it does not sound
Please help me aftr givng supply the buzzer begins to sound....The switch is not working in the circuit!
Try Grounding the control pins of both 555 ICs using 0.01uF capacitor.
Great circuit, is there the possibility that a wireless doorbell circuit could be posted. I am really interested as to the difference in the circuits with there needing to be a receiver and a transmitter circuit.
Yes it can be done using Microcontroller with some wireless technology like Wifi, GSM, RF etc.
thanks for de circuit
This does not work, your circuit diagram is wrong
what wattage resistors are you using? 1/4, 1 or 2 watt resistors?
Some components are missing and this causes problems. Pull-up resistor is needed for button. Also decoupling capacitors needed for 555 power inputs.

GOOD PROJECT