
An emergency light is an integral part of household electronics nowadays. We all know an Emergency light is used during a power failure to light up the home. As it is used during a power failure, it should last long, hence generally bright white LEDs are used in emergency lights, because they produce more light and consume less power. Emergency light is a very useful and popular project in the DIY section. So today we are going to build a simple and cost-effective emergency light project.
In this emergency light circuit, when the Power goes OFF, the emergency light activates automatically. We have used four bright white LEDs, more LEDs can be added to produce more light, considering that the total current consumption should not exceed the supply current. Ultra-bright white LED consumes 3V and 20mA of current.
Table of Contents
Circuit Diagram of Emergency Light - Explanation
We can divide this LED emergency light circuit into two parts; the first part is used to drop down the 220V AC voltage into 8v regulated DC, with the help of a transformer and a bridge rectifier. And second part consists of a Relay and a rechargeable battery, which is used to light the LEDs during a power failure.
Components Required for Emergency Light Project:
- Transformer- 9-0-9 500mA
- Bridge rectifier
- Diode- 1N4007
- IC 7808 voltage regulator
- Capacitor 1000uF, 0.01uF
- Relay- 6v
- Resistors- 100 ohms
- LEDs- Ultra-bright white LED
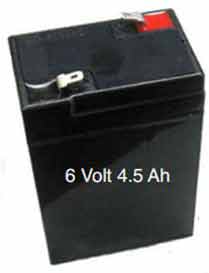
- Rechargeable 6v, 4.5Ah Battery
Power Supply Design for Automatic LED Emergency Light Project
In the first part of the circuit, we have used Transformer 9-0-9 500mA, to step down the 220 voltage into 9V. A bridge rectifier is a combination of 4 diodes that is used to remove the negative half component of the AC. This process is called the Rectification. Further, a 1000uF capacitor has been used for Filtration, meaning removing the ripples in the resulting wave. And the voltage regulator 7808 has been used to regulate the DC wave, to provide an uninterrupted and smooth 8V DC supply. The whole process of converting 220V AC into low-voltage DC, has been explained in this article: Cell Phone Charger Circuit

The second part of the emergency light circuit consists of the main functionality, that is to automatically switch ON the emergency light (Array of white LEDs) on Power Failure. We have used Relay here to automate this. A 6V, 4.5Ah rechargeable battery is connected to the Array of LEDs, through a Relay. Normally, when there is no power failure, the coil of the Relay remains energised, and the lever is attracted towards the NO (normally open) terminal, and the NC (normally connected) terminal remains open. In this situation, LEDs are disconnected from the rechargeable battery and remain OFF, also the battery is getting charged through the power supply from the transformer. A diode D5 is used to prevent the battery from flowing back.
Now, when the power fails, the relay coil becomes de-energized and the lever gets connected to the NC terminal, which connects the LEDs to the rechargeable battery, and the LED array goes ON. This is how this emergency light works. Now, when the power is restored back, the relay gets activated and the lever again connects to the NO terminal, which in turn disconnects the LEDs from the battery and connects the battery to the transformer for charging. This is the circuit diagram of an emergency light
Generally, 6v, 4.5Ah rechargeable battery comes with Deep discharge recovery and overcharge protection mechanisms, but we can use a zener diode of 6.8V to protect the battery from overcharging. We can also use other rechargeable batteries like Nickel-cadmium battery (NiCad), Nickel–metal hydride battery, cell phone batteries, etc. Further, we can also use the PNP transistor BD140 in place of the Relay. PNP transistor can be used here as a switch, like it will be OFF when a continuous voltage is applied to its base of it, in case when power is there and it will be ON, in case of power failure, which connects the LEDs to the rechargeable battery, and activates the LED emergency light.
This emergency light can also be made using an LDR (light-dependent resistor), in which light will automatically switch ON according to darkness, meaning it remains switched OFF in the presence of light and switches ON in the absence of light.
Uses and Advantages of this Automatic LED Emergency Light Project
An indispensable household electronic device for emergencies, this emergency light project offers dependable automatic operation during power outages. The project for an automated LED emergency light is ideal for:
» Emergency lighting for homes during blackouts
» Emergency lighting for offices and businesses
» Automatic lighting in the garage and workshop
» Electronics projects and education for students
» Do-it-yourself emergency preparedness results

Frequently Asked Questions
⇥ Can I increase the number of LEDs in this project for an automatic LED emergency light?
You can increase the number of LEDs, but make sure the transformer rating doesn't exceed 500mA. Compute: For safe opera tion, the total LEDs × 20mA should be ≤ 500mA.
⇥ How long does it take for the 6V battery in this emergency light circuit to charge?
Using this circuit's charging mechanism, it normally takes 8–10 hours to fully charge a 6V 4.5Ah battery from a fully discharged state.
⇥ In the event of a power outage, how long does the emergency light project battery last?
A 6V 4.5Ah battery and four 20mA LEDs allow the emergency light to run continuously for more than 50 hours during a power outage.
Related Emergency Light Projects
Check out our engineer-built emergency lighting projects in the gallery below —click to learn more.

Raspberry Pi Emergency Light with Darkness and AC Power Line Off Detector
In this session we are going to make a 9WATT Emergency Lamp using Raspberry Pi and Python. This lamp will automatically detect the darkness and absence of AC power supply, and light up when there is power failure and proper light is not there.

Arduino Light Sensor Circuit using LDR
In this circuit, we are making a Light Sensor using LDR with Arduino to control a bulb/CFL as per light condition of the room or outside area.

Mechanically powered Emergency Flashlight
So in this tutorial, we are going to make an emergency flashlight that can be charged by rotating a small DC motor attached to it. To build this, we are using a Supercapacitor, LED, and Schottky diode. The supercapacitor is used to power the LED, and the DC motor is used to recharge the supercapacitor.
Comments
Thanks for the diagram on how a cell phone charger circuit works. A friend of mine likes to make things like this out of spare parts around our house. We haven't been able to figure out how he does it, but it works every time. Thanks for sharing!
Thanks!
Nice.i want to learn this circuit but i don't know how to i learn it.thanks
sir mujhe detail main sab bataiye
Sir,
I have a 21 LED rechargeable lamp.but now the battery didn't holds the charge.
How can i work it with out using the battery,by giving ac current continuously..
PLEASE HELP ME
Sir,
Can you give me a circuit of a reachargeable emergency light with battery status indicator using red and green led with a ldr and scr using 6v battery
Sir,
could you use 3 AAA rechargeable batteries in series instead of the 6v that you used for this project?
12volts 150Ah
Thanks u a lot for all that useful informatios keep it
Anyway I went to buy transistor bc 547 but instead the guy gave me C 9014, after that he convinced me with an excuse of the bc series has been eliminated from the system by substituting it with c series
Any further explanation
A Very Good project for student
Nice design!!! but pls suggest if i want to add more leds for extra brightness or an alternate led of high wattage ahould i chnage the ic or the battery capacity ..and what should be done to make the leds glow during the prescence of ac mains....help pls
Yes you may need bigger battery to glow powerful LED, remaining circuit remains the same.
i like it ...i love it this site is very very exited for all people and students .....
just one question how and whr to put LDR thr ? thank u
Sir how can I use overcharge protection ckt using zeher diode plz give me ckt diagram of overcharge protection ckt with zeher...help me...
can i replace the 6 v battery with 12v battery and replace all the led with 1 bulb lamp 24v
what is the use of that circuit, u can connect directly from the power source
Sir,
In the article you said that we can use pnp BD140 transistor in place of relay. I want to know why BD140 only. Can we also use BD136 or BD138.

Projects are very nice. these are practically applicable for human society..