
What is LabVIEW?
LabVIEW is an acronym of Laboratory Virtual Instrumentation Engineering Workbench. Their appearance and operations resembles real world instruments, such as button, voltmeter, oscilloscope, etc,. and hence they are called as Virtual Instruments (VIs). It offers a graphical programming approach and helps to simulate real world products, which helps you to visualize and program. Thus it requires only logic to program and it is syntax independent. LabVIEW is a high level design tool. It is an interpreter programming (i.e.,) we need not compile it. It compiles itself, we only need to execute it.
How it Differ From Other Circuit Designing / Simulation Softwares?
All circuit designing / simulation software’s are a schematics that capture and simulation program that enables you to test the output of various circuits by assembling the components and drawing schematics. Whereas, LabVIEW is a virtual workbench for graphical programming by capturing and interfacing of virtual circuits created on any circuit designing / simulation softwares.
Programming can be of two types. They are text based and graphical based programming. C, C++, java, etc,. are all text based textual programming languages, and MATLAB is intermediate level language, whereas, LabVIEW is graphical based programming language.
Why One should prefer LabVIEW?
The one who does not have any basic knowledge about programming can start LabVIEW. To do LabVIEW programming one should have practical knowledge and logical thinking capability. LabVIEW programmer need not know any programming syntax or any structure of programming like c, c++, java programming languages.
One can prefer LabVIEW, when the program is too large. This is as simple connecting hardware components for your project but in a software.
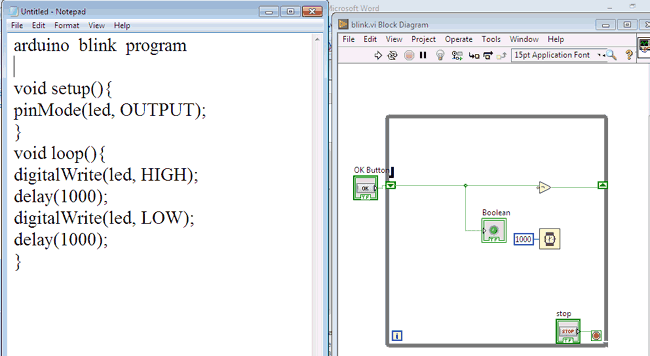
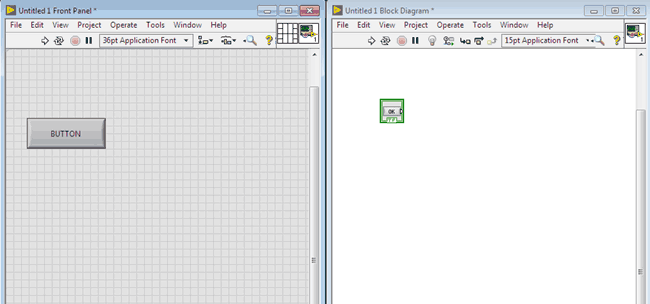
Below diagram is showing the difference between textual and graphical programming. On the left side, there is an Arduino program to blink a LED with 1 second delay, and on the right side its graphical replica has been made using LabVIEW software. Whenever you press OK button the Boolean LED will blink on and off with 1 second of delay.
Launching LabVIEW
First download LabVIEW software from National Instruments. Once you launch the software, Getting Started window appears.
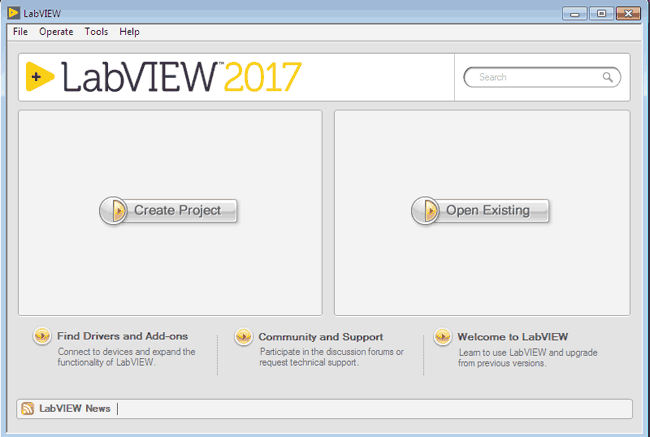
This window is known as Getting Started window. Press ctrl+N to open a New Project.
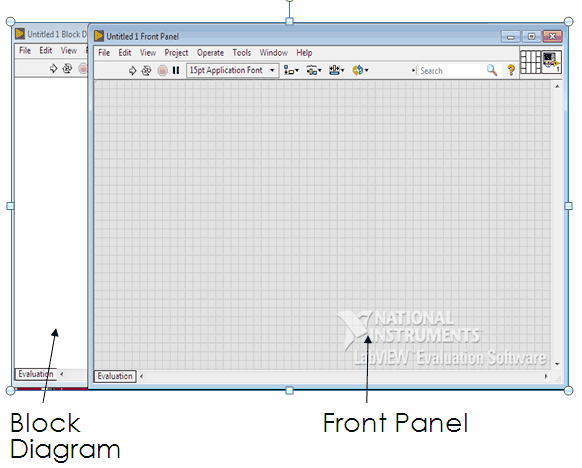
Once you open New Project, you will see front panel and block diagram.
Getting Started window disappears once you open new or existing project. It reappears when you close all front panels and block diagrams. You can also reach this window from front panel or block diagram by selecting View >> Getting Started window.
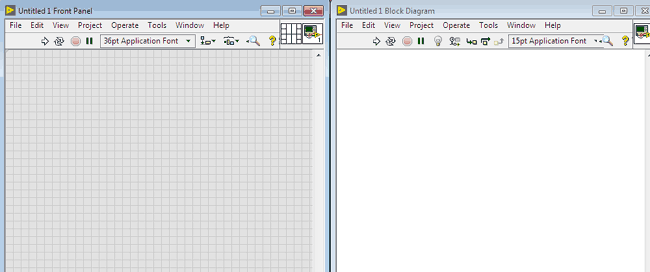
Press ctrl+T to bring front panel and block diagram side by side like this,
In LabVIEW, you will be building a user interface i.e., front panel, with controls and indicators. Controls are nothing but the inputs you give, such as knobs, switch, etc., Indicators are nothing but the outputs you create, such as led, graphs, etc., I will explain all the entities with an example, to make you understand better.
Data-types in LabVIEW:
Data-types are nothing but the classification of variables. The following are the data-types used in LabVIEW and their color specification in the block diagram.
|
Data-types |
Colours |
|
Floating point |
Orange |
|
Integers |
Blue |
|
Booleans |
Green |
|
String |
Pink |
|
Polymorphic |
Black |
Polymorphic- The one which can be any of these above data-types or may not be these.
Example 1: Glowing LED on Button Press
Adding Controls to the Front Panel
Front panel controls simulate the input mechanism on a physical instrument and supply data to the block diagram of the Virtual Instruments (LabVIEW programs are called VI or Virtual Instruments).
- Select View >> Controls Palette to have the controls or functions palette permanently on the screen, or right click any blank space in the front panel or block diagram to display it temporarily.
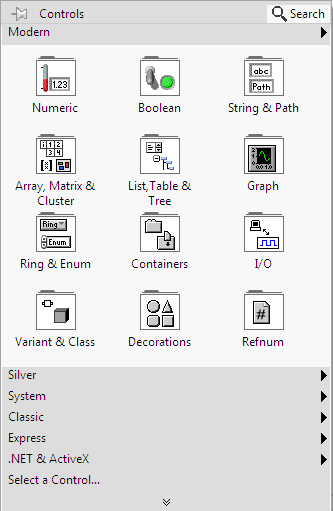
- Move the cursor over the icons on the Modern palette to locate the controls that you require (Boolean Controls Palette) .
NOTE: As for glowing led with button press, the control over here is button. So select the Boolean controls palette.
- Click the Boolean controls icon to display the Boolean controls palette.
- Click the button control on the Boolean controls palette to attach the control and then add the button to the front panel.
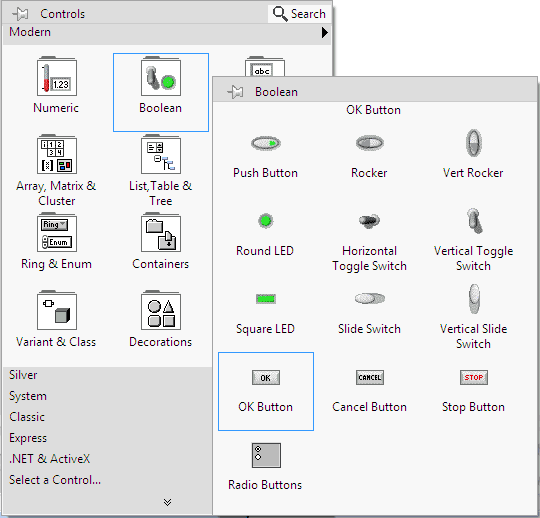
You will use this button control to glow the led.
Thus button control is added to the front panel.
Adding Indicator to the Front Panel:
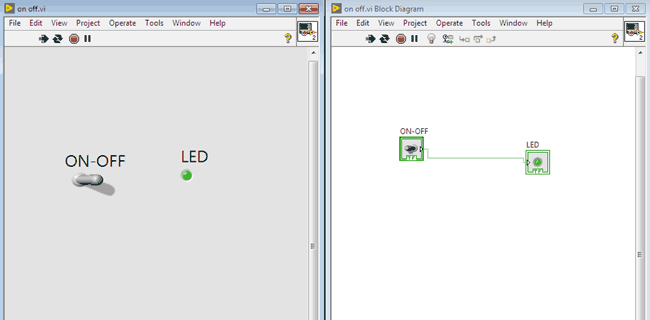
- Similarly add button from the Boolean palette. Then give connection as shown below,

To Run the Virtual Instrument:
- Select Operate >> Run/Run Continuously.
- Or you can use the icons which I have mentioned in the above figure.
- To stop the execution again press run continuously icon.
Thus the led glows when you press the button.
Note: If the run button is broken, then it means there is a error in the LabVIEW programming. To know what error is, press that broken run button, you will approach a dialog box describing the error.
Refer video given at the end of the article.
Example 2: LED ON-OFF
In the below example, instead of button, we will use knob from Boolean palette.
Note: Check the Video at the end.
Example 3: Blinking LED
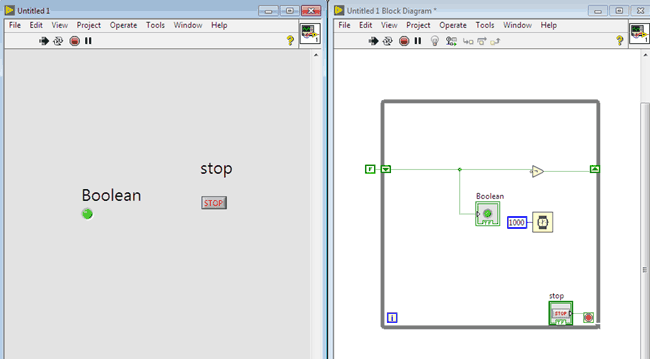
- In the above example, I have removed the ok button and added the stop button.
- Right click on the block diagram window, Functions palette will appear.
- Pick and drag while loop.
- Right click over the while loop and select Add Shift Register.
- Right click on the block diagram and select Boolean, in that select Boolean not gate.
- Similarly, pick and drag delay and add constant to it.
Constants are value that you can change according to your requirement like 1000ms for 1 second.
- Give the connections as shown in the above diagram.
NOTE: You can use your own logics to build above examples.
Shortcuts
You can use the below keyboard shortcuts to control LabVIEW.
|
shortcut |
function |
|
<ctrl+N> |
Open a new, blank VI |
|
<ctrl+H> |
Shows or hides the context help window |
|
<ctrl+Space> |
Displays he quick drop dialog box. |
|
<ctrl+B> |
Deletes all broken wires in a VI |
|
<ctrl+ L> |
Displays the error list window. |

Labview comes into its own when controlling Test and Measuring Equipment. It has drivers for a vast number of Instruments from many vendors. For Industrial users it is an essential.
But, the pricing structure reflects this. If it is for you, you will know about it already.. or have deep pockets.
I did download the trial to write some code, but could not run it at work because code written on the trial won't run on anything but the latest version.. If there is a $30 version for home users, they don't advertise it on their web site.