

It is estimated that there will be around 20.4 billion devices connected to the internet by 2020, well how big is this number? To give a figure the total world population is 7.6 billion, meaning there will be around 3 devices connected to the internet for every human on the earth. This makes it evident that Internet of things will have a major role and strong impact in the future. Adding to this the largest Internet retailer in the world Amazon Inc. also provides IOT services in name of AWS IOT.
The AWS IOT service stands for Amazon Web Service Internet of Things. It allows you to connect your things (devices) to the internet to exchange data securely, process it and act upon it. It is very popular cloud for IoT Projects. Along with AWS IOT the Amazon web services also provides tons of other features like virtual machine deployment, web-hosting and other stuff which is way out of scope of this tutorial. In this tutorial, we will get started with the AWS IOT by creating a thing and then we will test if the thing is working properly using the MQPTT.fx application.
Creating you Amazon AWS account
First things first, to get started with anything using AWS IOT we need an account in Amazon AWS. Just get into the Amazon AWS website and click on “Create a Free Account”.
You will be taken through the sign up procedure. During the process of sign up Amazon will ask for your Debit/Credit card details. Sadly we need either of one to create an account with AWS. But, since you can use it for free for duration of 12 months it should not be a problem. Just enter your card details since you will not be charged for 12 months, but make sure to de-activate the account before 12 months if you are not using the account any longer.
You will also be asked for PAN number which is not mandatory, once the sign up process is complete log in to you account.
Create a AWS Thing with Certificate and Policy
Step 1: In the main page, under AWS services search for “iot core”. You should see the IOT core option being listed as shown below click on it to open the AWS IOT console

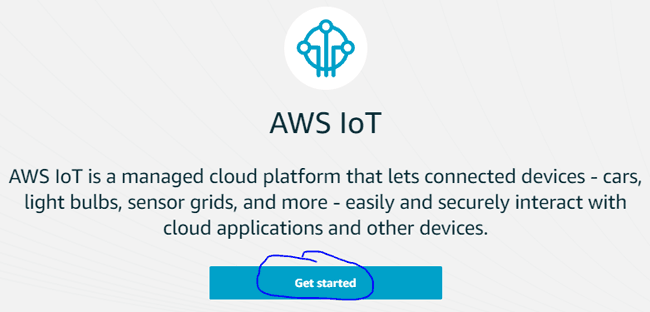
Step 2: You will be greeted with the introductory message from AWS IOT, just click on “get started”
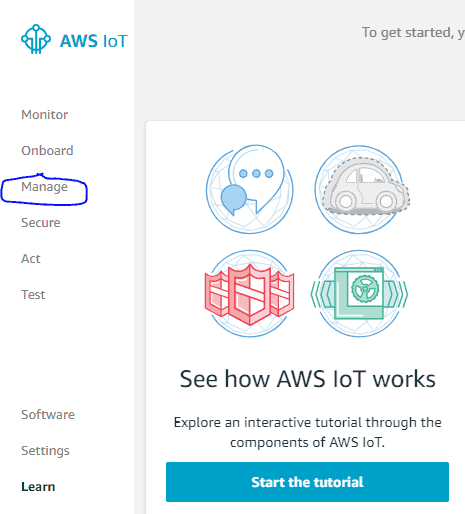
Step 3: You will be taken to the main page, where you will find some tour documents. You can read through them if interested. But to proceed with the tutorial click on the “Manage” option on the menu which can be found at left side of you screen as highlighted in below picture.
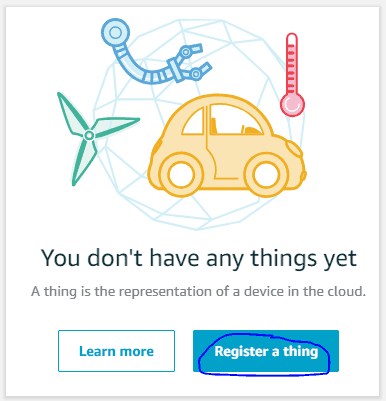
Step 4: Now, it is time to register a thing. A thing is a device like a sensor module or ESP8266 or ESP32 or any device which can connect to the internet. So we should create a thing on the AWS console through which our actual devices can communicate. To create the thing just click on the “Register a thing”
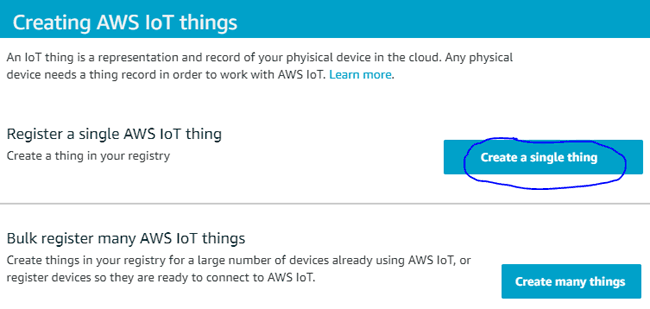
Step 5: There are option to create a single thing or multiple ones, if we create multiple ones they all will share the same security features. For now to keep things simple to get started we will just create a single thing by clicking on “create a single thing”
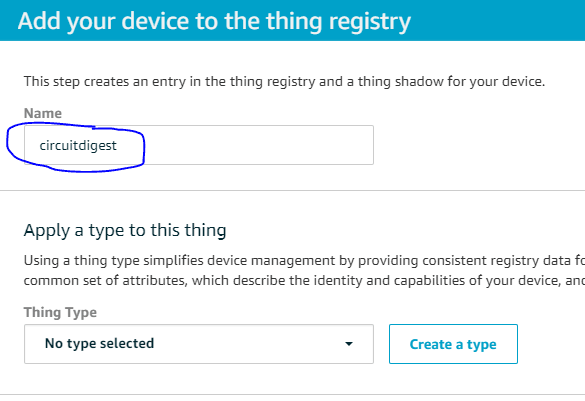
Step 6: We have to provide a name for the thing we are creating, it can be any name here I have named my thing as circuitdigest. After naming the thing just scroll down and click on next. If you are interested you can read through the other options which gives more definition to the things functions, but you can ignore them for now.
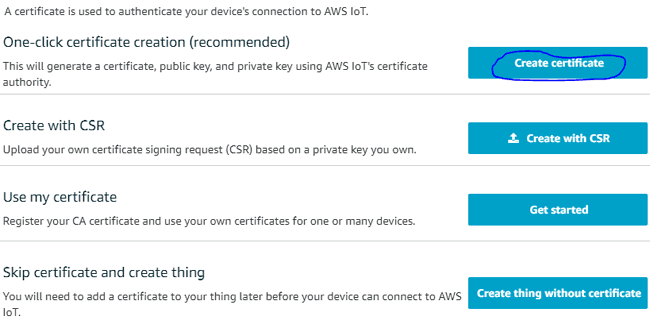
Step 7: One peculiar feature with AWS IOT is that it is of industrial standard since the communication is highly secured. So for everything we create we have to associate it with a certificate and a policy. So as soon as you hit next in the previous step you will be prompted to choose your security certificate. We have to create a new one clicking on “Create Certificate”
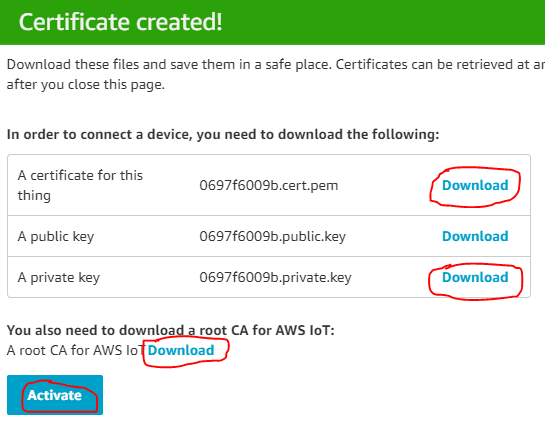
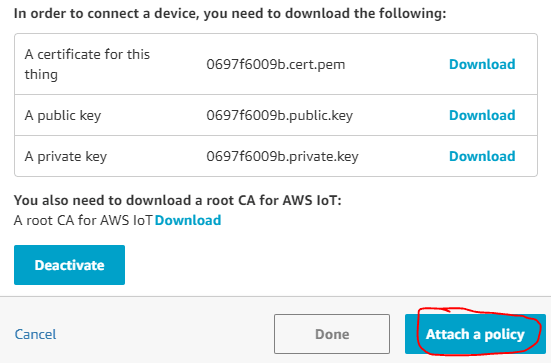
Step 8: Here AWS will provide the keys for the thing that we just created. This thing can be accessed only through validating through these keys. Make sure you click on the Activate button first and then download the three key files and save it on your computer somewhere secure. Never share these keys with public, since they can use your AWS account by launching this thing and you will be charged for it.
Step 9: The three key files that I downloaded is moved to a folder on my desktop, a snap shot of the same is shown below. For some users the CA file when downloaded might open on chrome as a stream of code. In that case just right click on the code and click save as and save it on your desktop. Make sure the extension of the file is .pem if it ends with .text change it.

Step 10: Once you are ready with the certificates we have to create a policy for our thing. Download and save the certificates in a known location and get back to your browser windows and click on “Attach a policy”
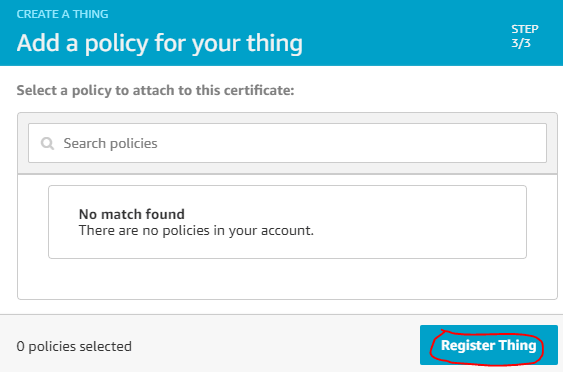
Step 11: Right now there will be no policies in your account since you have just created it so, for now leave it and click on “Register Thing”. We will create a policy in our next step and then attach it.
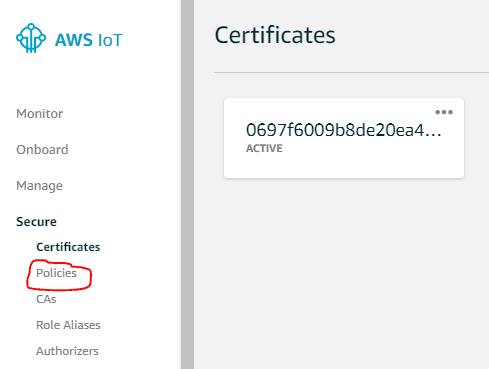
Step 12: You will be taken back to the main page, here we have to create a policy so on the left side menu find for an option called secure and then click on policies as shown below
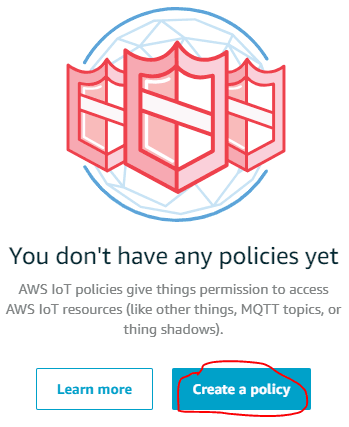
Step 13: As we know we don’t have any policies yet so click on “create a policy “
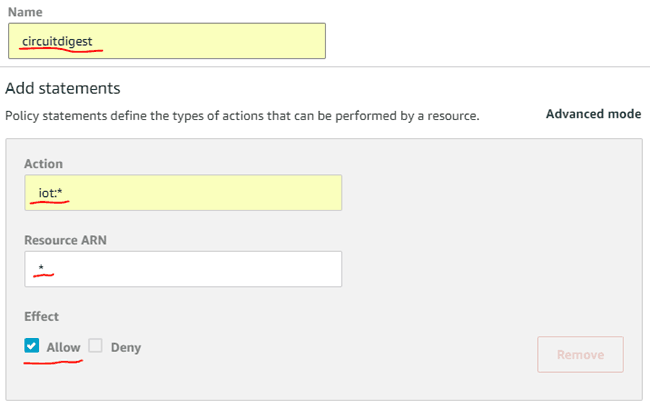
Step 14: In this step we will create a policy, the name of the policy will be circuitdigest for me, but again it is a user choice. For action enter iot:* and for Resources ARN enter *. Also make sure the allow button is checked for allowing effect.
Iot:* Indicates that we can both subscribe and publish to the things with this policy
* Indicates that the thing is accessible to all clients who have access to this certificate
Finally press the “Create” button on the end of the page to create the policy.
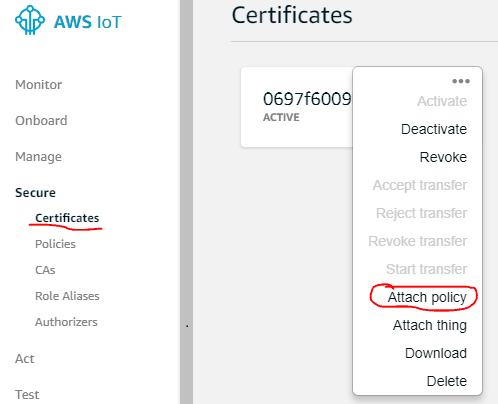
Step 15: You will be taken back to the main page, now select secure and certificates to get the following page. In the page you will have the certificate that we created previously, we have to add the policy that we just created to this certificate by clicking on options and selecting “Attach policy” as shown below.
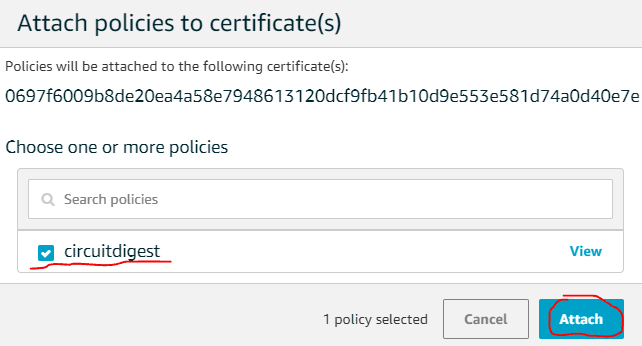
Step 16: You will get a pop-up in which you can select the name of the policy that we just created and then click on accept button. For me the name of the policy is CircuitDigest
That is it, we have created a thing, a certificate and a policy and have linked the policy and certificate to the thing that we have created. Next we can check if the thing is working by using the “test” option in the AWS IOT console. Before that we need to get the Broker address of the thing we just created.
Getting your AWS thing Details:
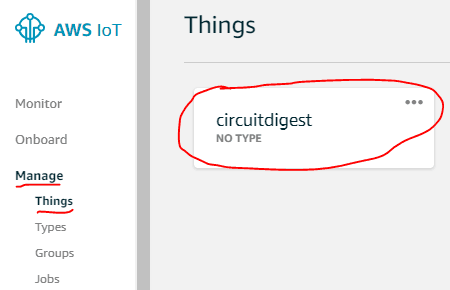
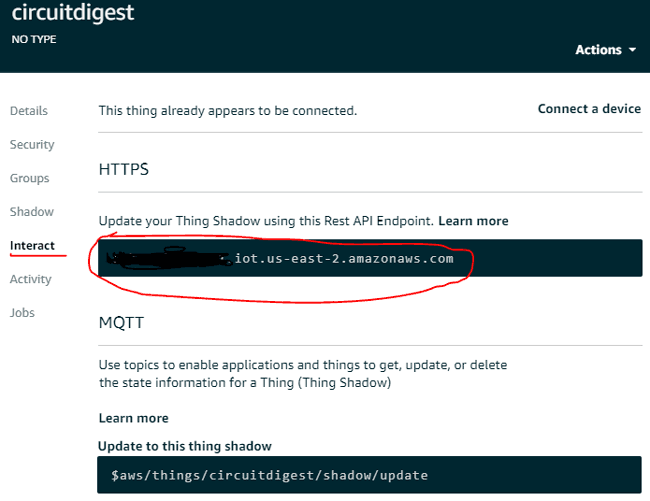
Step 1: After creating a Thing we need to get the details of the thing like its broker address update link etc to access the thing from anywhere using the internet. These details can be found in manage option and clicking on the name of the thing.
Step 2: In the new page click on interact option on the left side of the screen and you will be provided with all the links for accessing your thing. As said keep these links confidential. For now we need the HTTPS link (Circled in red) for testing if the thing is working properly so just copy it.
Testing the Thing using the AWS:
Step 1: Go to the main screen and select the Test option. This will load the MQTT client which can be used to test our thing.
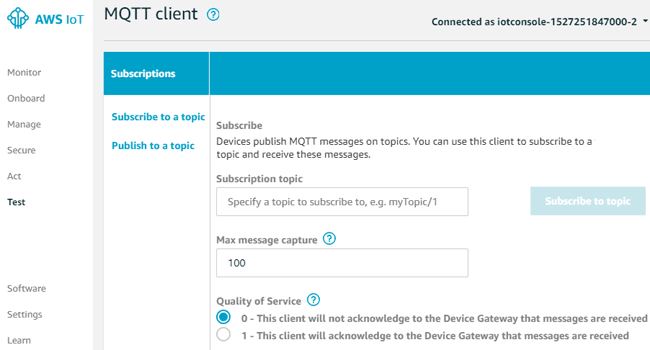
Step 2: On the left side you can see two options Subscribe to a topic and Publish to a topic. First you have to subscribe to the thing we just created by entering the name which in my case is circuitdigest.
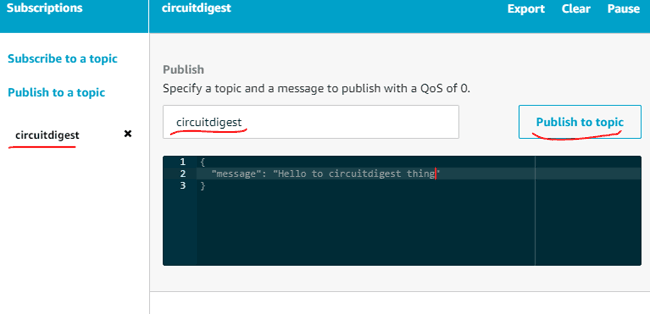
Click on publish to topic and you should see the message reflected in your thing as shown below

Using MQTT.fx with AWS IOT:
MQTT.fx is an application which can be used as a client to test and debug IOT devices. In the following steps we will learn how we can connect the MQTT.fx with the thing that we just created.
Step 1: Download the MQTT.fx file form this download link. Make sure you select the correct operating system of your machine.
Step 2: Open the application and click on the settings icon to configure the MQTT as client. The settings icon is shown in the picture below:
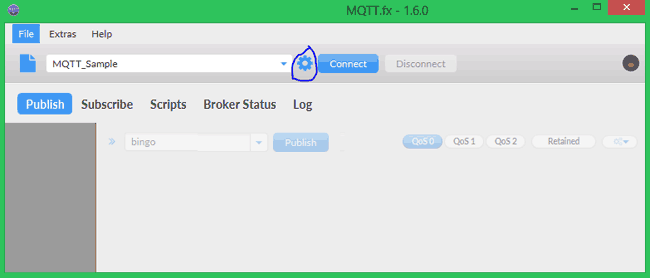
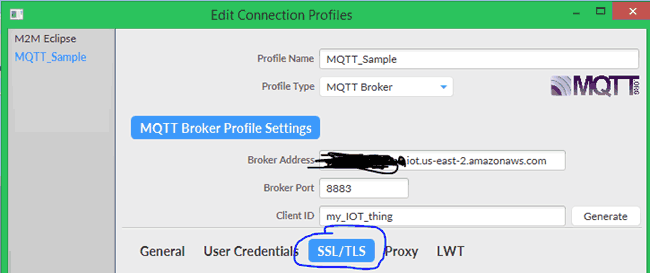
Step 3: A new window called Edit Connection Profiles will pop up. Here we have to create the profile for the thing that we just created using Amazon AWS. In the Profile name give a name of your choice I have given “MQTT_Sample”. Then for the broker address paste the address that we got in previous section of “Getting your AWS thing Details” section. The Broker Port for AWS IOT is 8883 for all users so enter the same. Then select SSL/TLS
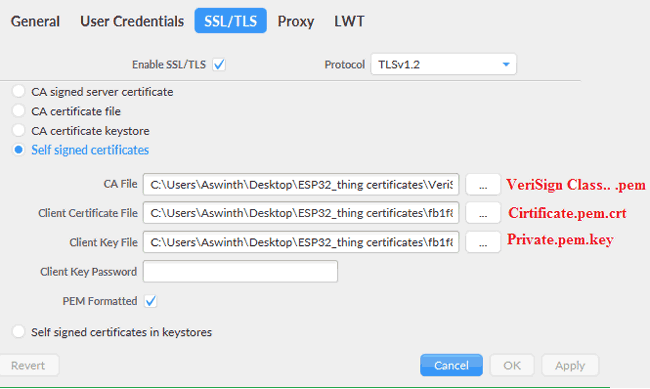
Step 4: Now we have to select Self-signed certificates and link the certificates that we downloaded in step 8. Also make sure PEM formatted is checked. Follow the image below to know which keys you should choose
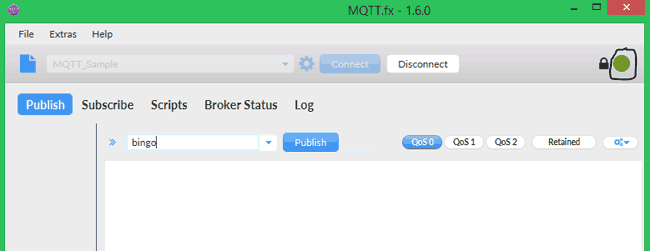
Step 5: Finally click on OK and then you will taken back to the main window. Now click on the connect button. IF everything is working properly then MQTT should be able to connect to our thing and the following screen will be displayed. Check for the green circle on the top right corner (en-circled)
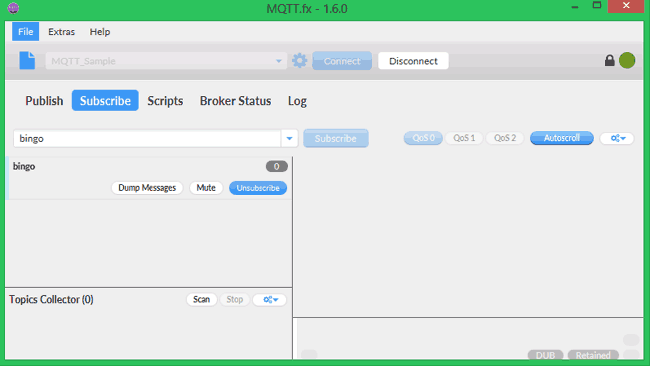
Step 6: Now that we are connected to the thing we can try testing it subscribing to a name. Click on Subscribe tab and give any random name and then click on subscribe. Here I have selected bingo as my name. After subscribing you will get the following name.
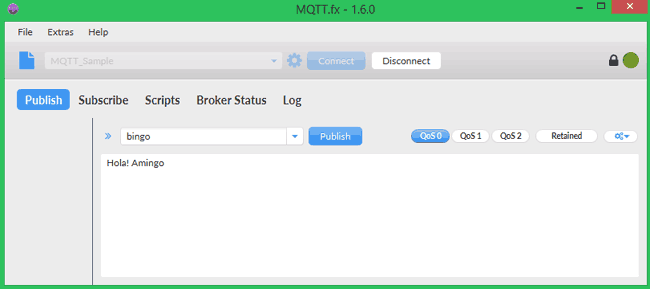
Step 7: Now go back to the Publish screen tab and publish a message and check if we are getting it on our subscribed channel .To publish a message use the same name. Here I have used the same “bingo” as my name and my message is “Hola! Amingo”. Click on the publish button
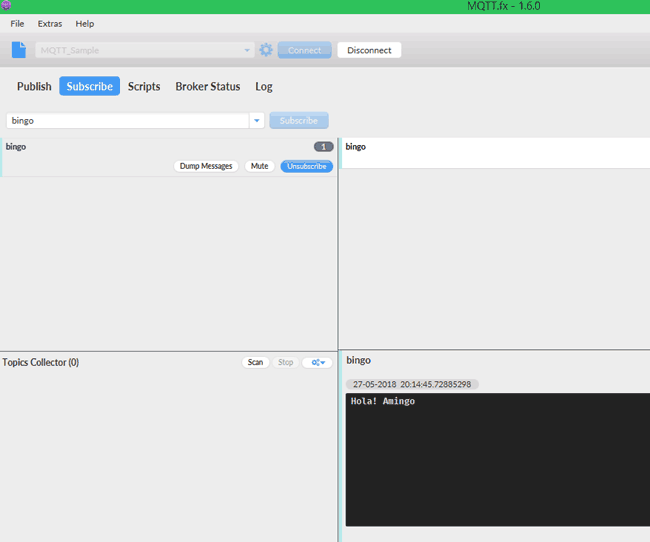
Step 8: Now go back to Subscribe tab and you should be able to see the message that we just published as shown below
We are all done with creating and testing our thing that was created using AWS IOT. Since we have also linked it with MQTT as client it should be easy for us to monitor and debug the thing in future. You can also follow the video at the bottom to get a better understanding.
In our next tutorials, we will learn how we can use actual hardware things like ESP8266, ESP12, Raspberry Pi etc to use this thing to send/receive information.
