

Alexa is the language assistant launched by Amazon in 2014 and used, for example, in smart speakers such as the Amazon Echo or the Echo Mark. Alexa serves as a central control unit in these devices which respond to the user's voice commands. For example, you can download songs from Amazon Music or Spotify, play audiobooks from Audible, and get news and weather updates. Even the program can manage regular activities like shopping and to-do lists can be determined and appointments can be scheduled in the appropriate calendar. So, in this tutorial, I will show you how to build your own DIY version of the Amazon Alexa by installing Alexa Voice Service (AVS) on a Raspberry Pi 4.
Components Required for Building Alexa
- Raspberry Pi 4
- USB Microphone
- 3.5 mm line-in speaker

Creating Amazon Developer Account
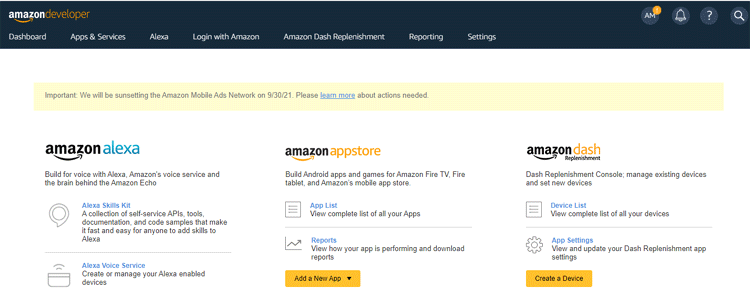
Before you install the Alexa on your Raspberry Pi, you’ll need to create an Amazon developer account. So go to Amazon Developers page and create a new account. Once you’re signed in, go to the Dashboard and select the Alexa Voice Service.
In the next window select the ‘Products’ and then click on ‘ADD NEW PRODUCT’.

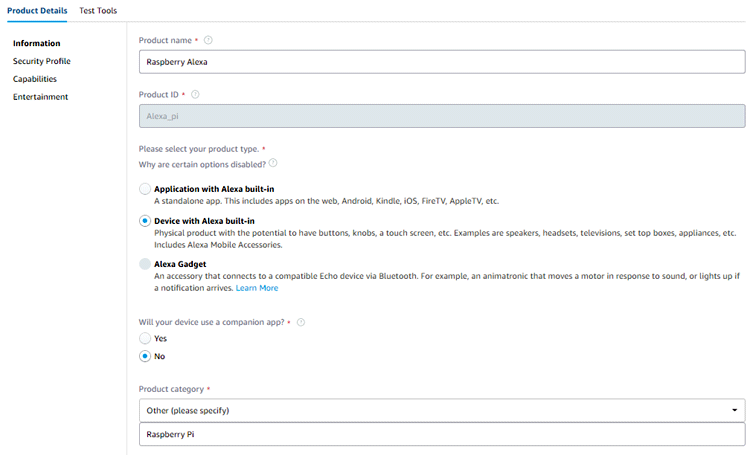
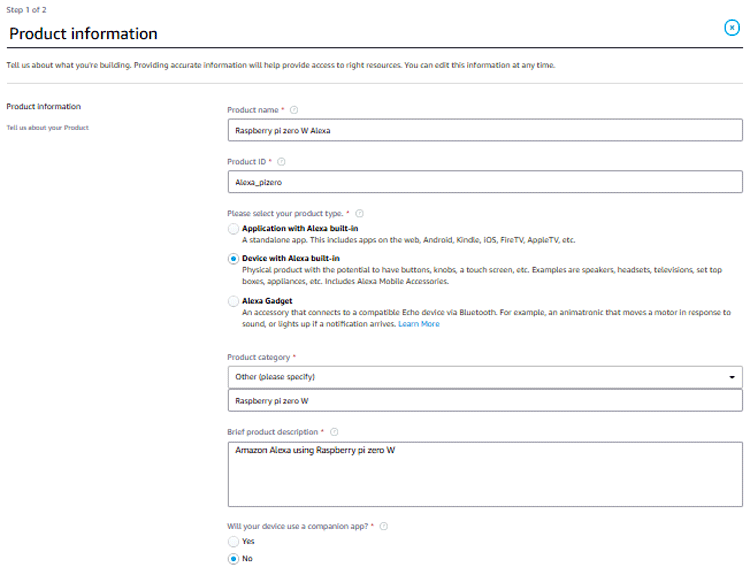
Now on the product details page enter the product name, product ID according to your choice. Select ‘Device with Alexa Built-in’ in product type and ‘No’ in the Companion app option.
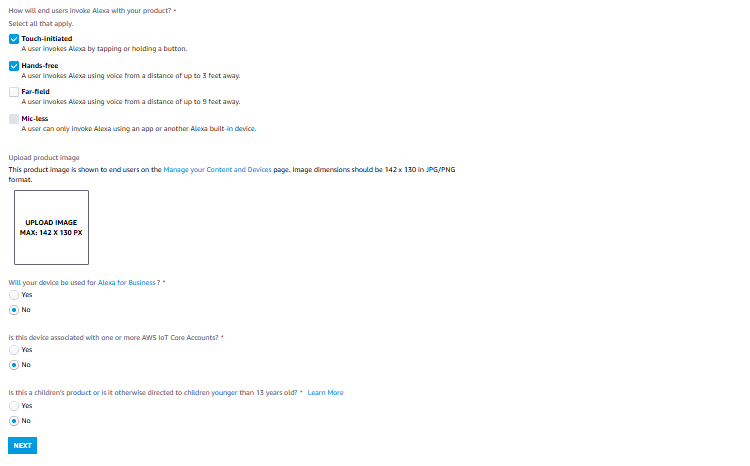
Scroll down and select ‘Other’ in the Product Category and then type ‘Raspberry Pi’ in the given box. Then write a brief description about your project like: ‘Amazon Alexa on Raspberry Pi’. Then select ‘Touch-initiated’ and ‘Hands-free’ for end-user interactions. Ignore the image option and select ‘No’ in the next questions, then click Next.
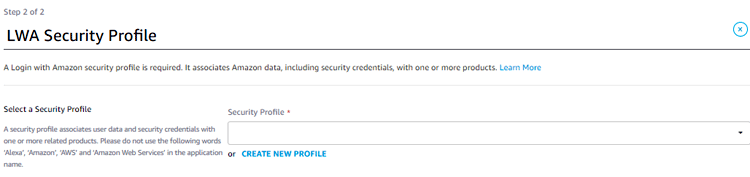
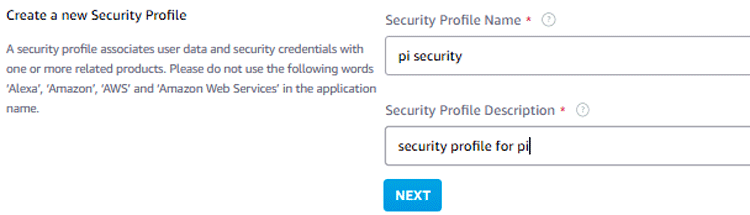
The next step is to create a security profile. So click on ‘CREATE NEW PROFILE’ and then enter the profile name and description in the next window.
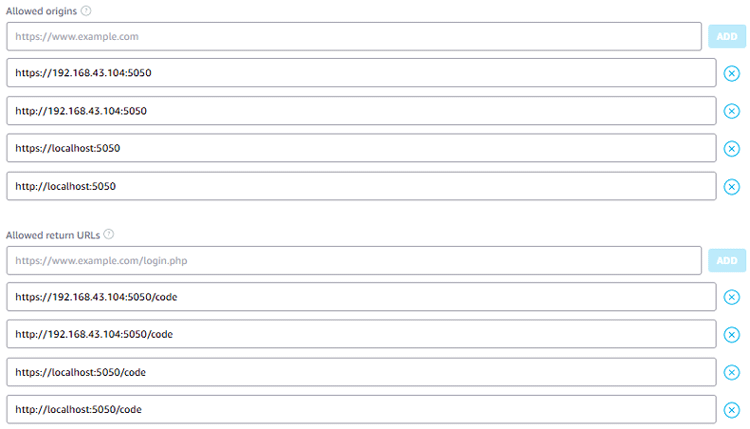
In the next window, we need to add some URLs to the Allowed Origins and Allowed Return URLs fields as shown in the image. Change the IP address according to yours. Then click on ‘Finish’. You’ll see a pop-up telling you that your product has been created.
Installing Alexa on Raspberry Pi
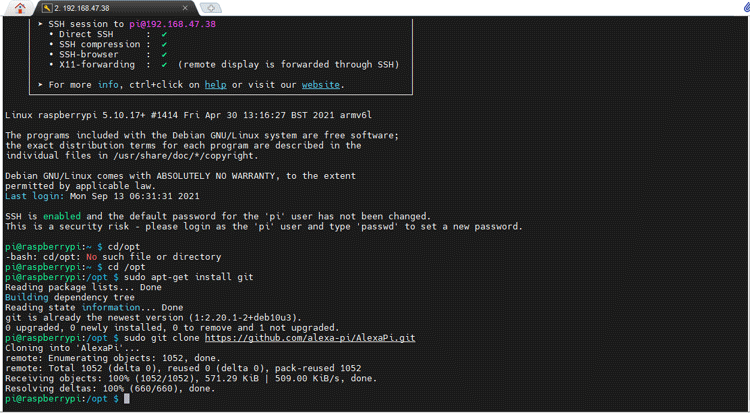
Now as we have Amazon Developer Account, we will install Alexa on Raspberry Pi, for that first move to the /opt directory by issuing:
cd /opt
After that install the git if it is not installed already. Use the below command to install the git:
sudo apt-get install git
Now clone the Alexa-pi repository into your Raspberry pi using the below command:
sudo git clone https://github.com/alexa-pi/AlexaPi.git
After cloning the Alexa-pi repository, run the setup script using the below command:
sudo ./AlexaPi/src/scripts/setup.sh
During this process, it asks about the OS and Device. Select ‘debian’ and then ‘raspberrypi’. After that, it will ask about the Device Type ID that is (Product ID), Security Profile Description, Security Profile ID, and Client ID and Client Secret.

If your account details are right then it shows you an URL on the Pi terminal window. Click on the URL or paste it in your browser and a page asking for permission will pop up.
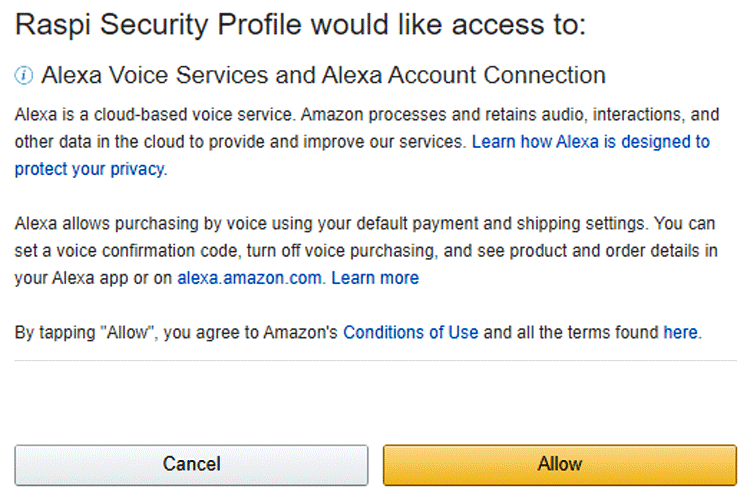
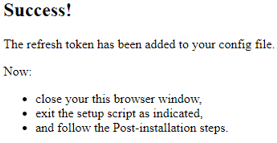
Click on Allow. In the next window, it will ask you to select the country. Select your country and finish the process.
Now, power your raspberry pi and connect the speaker to a 3.5mm jack and Mic in the USB port of raspberry pi.
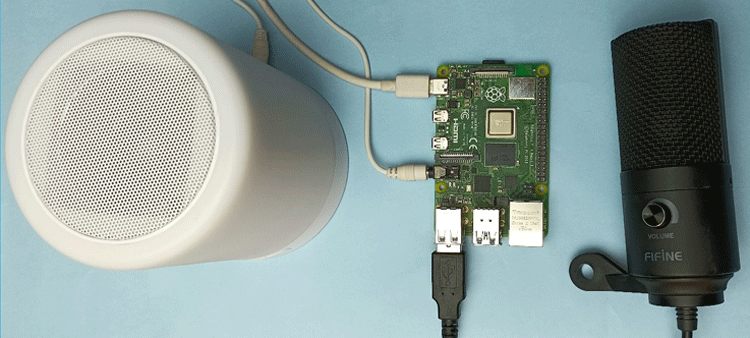
After this connect the USB Microphone and Speaker to Raspberry Pi and Reboot the pi. After rebooting, you will hear Alexa saying ‘Hello’. Instead of rebooting you can also use the below commands to start the Alexa service and check the status of the Alexa:
sudo systemctl start AlexaPi.service
sudo systemctl status AlexaPi.service
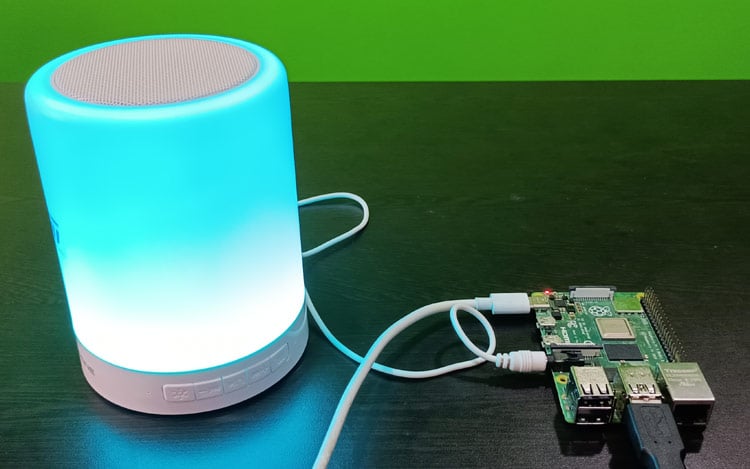
Here, you can see some working images of Alexa.
This is how you can build a Raspberry Pi Alexa Speaker. A working video is given below. Hope you enjoyed the project and learned something useful. If you have any questions, please leave them in the comment section below or use our forum to start a discussion on this.
