
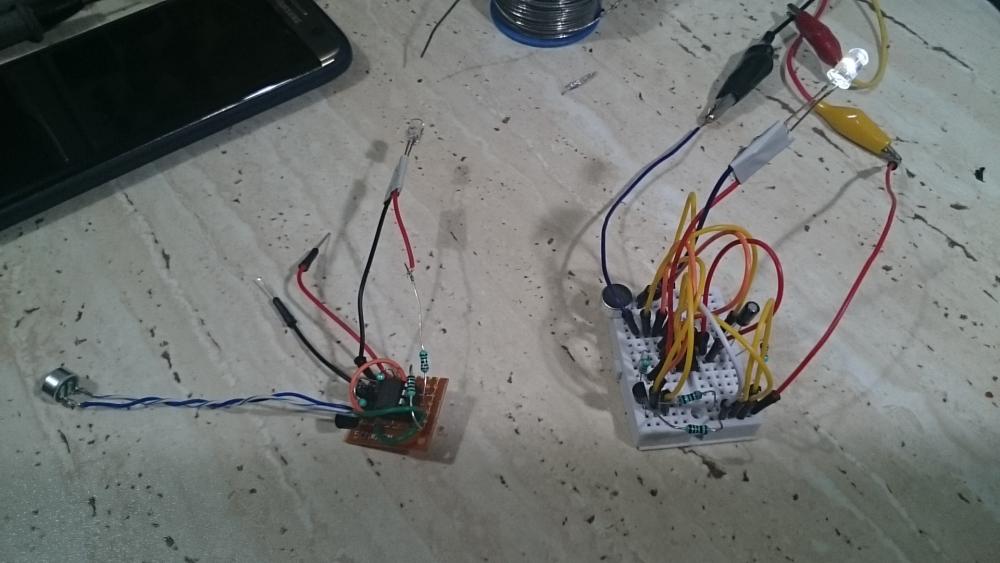
Clap switch is an interesting hobby circuit that turns on the lights with a clap sound. Although its name is “Clap switch”, it can be turned ON by any sound of approximately the same pitch as a clap. The main component of this clap switch circuit is the Electric Condenser Mic, which has been used as a sound sensor. The Condenser Mic basically converts sound energy into electrical energy, which in turn is used to trigger the 555 timer IC through a transistor. Triggering of the 555 IC turns ON the LED, which will be automatically turned OFF after some time. I have made this circuit as simple as possible; you can find many complex clap switches (using a 555 IC) with some more components in them, but they merely do the same thing. Even making things simpler requires more effort than making them complex. We've also built other interesting projects like our 555 timer astable circuit and push-on push-off circuit that might interest you.
Here we are using an Electric Condenser Mic for sensing the sound, a transistor to trigger the 555 timer IC, and a 555 IC to turn ON the LED through a low-voltage trigger. Before we move to the parts list, let’s quickly look at the theory behind how these three pieces work together.
Table of Contents
Theory Behind the Circuit
Let us take a quick look at what’s actually happening inside before we wire things up. The condenser mic picks up sound waves and turns them into a tiny electrical signal. That signal is too weak on its own, so we feed it into the BC547 transistor, which boosts it enough to drive the 555 timer. The 555 here is set up in monostable mode. In simple words, when Pin 2 gets a short low pulse, the output on Pin 3 goes high for a set time and then drops back low automatically.
Components Required
- Condenser Mic
- 555 Timer IC
- Transistor BC547
- Resistors (220, 1k, 47k, 100k ohm)
- Capacitor (10uF)
- LED
- Battery (5-9v) and Battery Snap Connector
- Breadboard Wires
- Breadboard
Circuit Diagram

Circuit Operation
Initial State
Take a look at the connections in the above circuit diagram of the clap switch. Initially, the transistor is in the OFF state because there is not enough (0.7V) base-emitter voltage to turn it ON. And point A is at high potential, and point A is connected to Trigger pin 2 of the 555 IC; as a result, Trigger pin 2 is also at high potential. As we know, to trigger the 555 IC through Trigger PIN 2, the voltage of PIN 2 must be below Vcc/3. So at this stage LED is OFF.
LED Turns ON
Now, when we produce some sound near the condenser mic, this sound will be converted into electrical energy, and it will raise the potential at the Base, which will turn the Transistor ON. As soon as the transistor becomes ON, the potential at Point A will become low, and it will trigger the 555 IC because of the low voltage (below Vcc/3) at Trigger Pin 2, and the LED will turn ON. We have connected the LED to Output PIN 3 of the 555 IC through a 220ohm resistor.
LED Turns OFF
After some time LED will be turned OFF automatically because we are using a 555 timer IC in Monostable Mode. LED will remain turned ON for 1.1*R1*C1 seconds. So we can see, with this formula, that we can change this duration by changing the value of Resistor R1 or/and Capacitor C1. We can modify this circuit using a Relay to control the Electronic devices (120/220V AC). Control PIN 5 of the 555 Timer IC should be connected to Ground through a 0.01uF capacitor.
Testing the Circuit
First, make sure your circuit is powered up. Give the mic a good clap. The LED should light up right away and then go off after a short time. Don’t worry if the LED doesn’t react to every little sound; this mic is small and has a limited range.
There's another way to test it. You can tap the mic gently with your finger to see a quick response. If that does not work, you might want to check your wiring, especially the transistor and the trigger pin on the 555 timer.
Once you've got it to work, go ahead and try clapping from different spots or angles to see how sensitive the setup really is. Also, you can swap the LED for a relay and test a small fan or lamp. Just be careful with the higher voltage.
Variations and Modifications
If you want to play around with this circuit a bit:
- Swap the LED for a relay, and you can turn on a fan or a bulb.
- Add a D-flip-flop (7474 IC), and now one clap turns it on, another clap turns it off.
- Try using an Arduino or some other microcontroller to do extra stuff.
- Change the resistor or capacitor if you want the light to stay on longer or shorter.
- You can also experiment with a clap switch module instead of building it from scratch.
Sound-Activated Switch Projects
Build your skills with interactive sound-based circuits that respond to claps, whistles, and other audio triggers. Explore a range of DIY projects that combine microphones, transistors, and microcontrollers to control LEDs, relays, and more, turning your sound into instant action.

Arduino Whistle Detector Switch using Sound Sensor
In this tutorial, we will learn how to detect whistle sound by interfacing the Sound Sensor with Arduino, and when a whistle is detected, we will toggle an AC lamp through a relay.

Clap On Clap Off Switch using IC 555
A "Clap On Clap Off" switch is an interesting phenomena that could be used in home automation. It works as a switch which makes devices On and Off by making a clap sound.

In this project, we are going to make a Clapper circuit using the concept of ADC (Analog to Digital Conversion) in ARDUINO UNO. We are going to use a MIC and Uno to sense the sound and trigger a response.
Comments
Me too having trouble with voltage rating
of capacitor
I want the same answer please tell if u solved it
1/8 W is fine except for LED resistor. I would use 1/4W for that. WVDC for the cpa would be 12V or higher.
can u please help me in telling the questions that are commonly asked during the documentation of clap switch using 555 timer???
How about if i want to use more than one led?? Is there any changes to the values of the components??
Circuit will remain the same, just connect second LED in parallel with existing LED with another 220ohm resistor. If you want to connect too many LEDs, then better connect them reversely, means negative legs connected to PIN 3 and Positive legs to Power supply.
How many LEDs? What is their Vf?
this circuit is not working.i was implemented in multisim to check simulate the circuit but circuit isn't work. kindly help plz tell anyone who practically implement in breadboard and then circuit is working or not????
Demo video itself showing that it is working.
How are you simulating condenser mic in Multisim?
it is not working because inthis ckt diagram first placed 47 k but in this video placed another resistor
bro i have made this curcuit but its not working right as u told above when i on the circuit the led on automatically nd off after 2 to 3 sec mic dosnt show any responce.......
i use a simple switch istead of mic in multisim....but now i was implemented on breadboard its doesnt work .....so plz tell me any solution
Double check the connections. And try using suitable Pull Up resistor for mic, try using 10k resistor.
this circuits can used for relay switch ..?
yes, you can directly connect Relay Module to the output of the 555 timer.
Hello! the circuit is not working properly when ever i connect the terminals of the battery the led is glowing constantly.I have checked the circuit many times but not getting any solution,need your help.
which type of condenser mic is used.... i tied making this but mine is not working.... plz help...
You know, it works, but NOT as you explained, in fact, it’s quite the opposite as you are explaining :
The microphone is working as a capacitor, so like an open switch for DC. This includes the transistor starts in ON state, and point A is at LOW potential (approx 0.2V), which means pin 2 of the 555 is also at LOW state and the Led is turning on (and by the working of the 555, it will be off after some time)
When a clap arrives at the mic, it will produce a sort of AC and the capacitor will act for a short period as a ‘closing’ switch. This means that the Transistor shall act as a barrier (the base will drop beneath the 0.7 V) and pin 2 get in HIGH state for a short time, and when the clap is done, it will get back to Low which will trigger the 555 again.
If you think I’m wrong, please use an oscilloscope to verify.
Can I connect a rectifier circuit for supply ___?
would you do the same circuit on PCB board?
Or at least send a link which shows it.
I made this circuit but this didn't worked...I think that i need to connect a 100nf capacitor to pin 5 of ic 555 ...am i right please tell me......
It is mentioned that : "small condenser mic don’t have long range", but can you tell the approximate range (in numeric value) of condenser mic where it can sense the sound. Thanks
does this work or not...???thats my question
i created this circuit but when i connect battery to the circuit my LED turn on the moment i connect my battery but after 5-6 sec LED turns OFF and i try to clap to turn it on but its not working when i remove my battery and reconnect it to the circuit same thing happens
i waant to kno wht cud be the reason behind this ?
please help me
i m using 47uf capacitor i dont hv 10 uf
Plz use pot instead of 47k resistor
after completing circuit my led is not turning glowing on sound why?
how to make clap switch for 230v loads...
i want to know how to connect a sound sensor with the 2 segment lcd display,so that it could count no of times a sound is made
Sir tell me which mic i will usr in make clapping swith. Tell me which mic i can use tell me about mic. Please sir
You should consider using rheostat as R4 to adjust the sensitivity.
july,2019
here 555 timer is in astable mode that's why we need a d flip flop to continue to be in on state until the next clap.But if we use 555 timer in bistable mode then there is no need of d flip flop, right?
I made the sketch twice with the components writen above, and the led is continuesly ON. Using 5v.
What should i do next?

what is the watt power of the resistor? 1 watt or 1/4 watt?, and also the capacitor, 10uF of what volts?, please be specific with your work, thanks