
Have you ever thought about jamming the Wi-Fi connection network? Now days Wi-Fi password hacking is very common, so by jamming the Wi-Fi network you can block or jam any Wi-Fi connection, and no one is able to connect to that Wi-Fi network even after knowing the password. This can be done with a tiny Microcontroller ESP12E, which is also referred as Wi-Fi module or NodeMCU. If you are new to this small but powerful chip, then go through Getting started with ESP12 article. ESP is very popular for Wi-Fi tricks like creating a fake Wi-Fi network, serving your own page to steals someone’s password, block the Wi-Fi network etc. Even ESPs are being sold, with all the software flashed on them for doing these tricks, you just need to Plug and Play. But here we are creating our own Wi-Fi jammer.
Technically, we are not making a jammer but a Deauther. There is a small difference between these. A Jammer sends noise signals to the Wi-Fi spectrum (2.4GHz) thus disturbing original Wi-Fi frequency spectrum. While a Deauther sends packets to interfere with your Wi-Fi signals thus disrupting the normal working of your Wi-Fi router. It behaves like a jammer.
There is a Wi-Fi protocol called 802.11 which act as a deauthentication frame. This is used to safely disconnect all the users connected with the router. To disconnect any device from some Wi-Fi network, it is not important to know the password or to be in the network, you just need mac address of the Wi-Fi router and client device and it is enough to be in its range of that Wi-Fi network.
Disclaimer: It is illegal to use jammer in the public areas without taking permission of govt. authority. This tutorial is just for educational purpose. Do it on your risk.
Two Methods to make Wi-Fi jammer with NodeMCU
There are plenty of available Codes or firmware to make NodeMCU as Wi-Fi jammer. You just need to burn the code or firmware into NodeMCU. Here we have selected two stable and easy methods, using which you can use NodeMCU to act as Wi-Fi jammer.
1. Uploading Jammer Arduino sketch into ESP12.
For this method we will use Arduino code and Library written by Spacehuhn and it is very long code so we will use this code to directly upload in our NodeMCU using Arduino IDE.
2. Uploading Wi-Fi Jammer firmware into ESP12 using ESP8266 flasher.
For this method we need Jammer firmware for NodeMCU which be downloaded from the given links:
- ESP8266 flasher
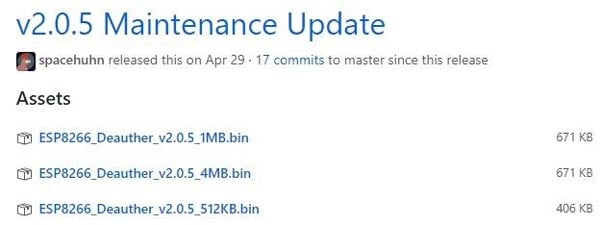
- Deauther Firmware – It is basically a .bin file .It is available for three NodeMCU versions depending on flash memory (1MB, 4MB and 512Kb). Download the version according to your board specification. In my case, board version is 1MB.
Method 1: Uploading Jammer Sketch using Arduino IDE
Let’s start with uploading the Arduino code
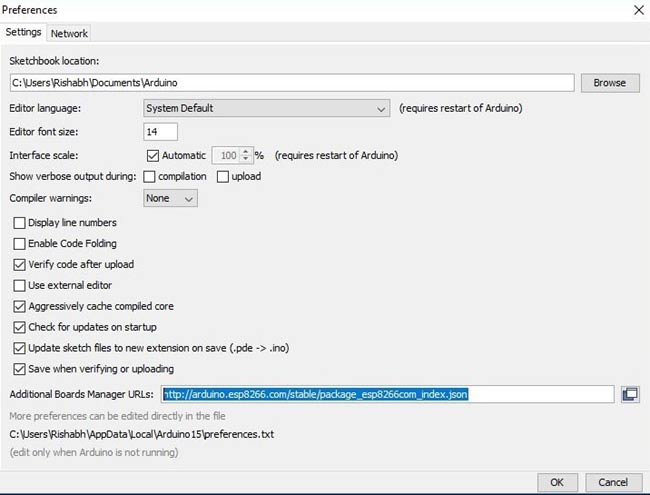
Step 1:- Go to File -> Preferences in Arduino IDE and add this link http://arduino.esp8266.com/stable/package_esp8266com_index.json
to the Additional Boards Manager URLs and Click on OK.
Close the Arduino IDE and Reopen it.
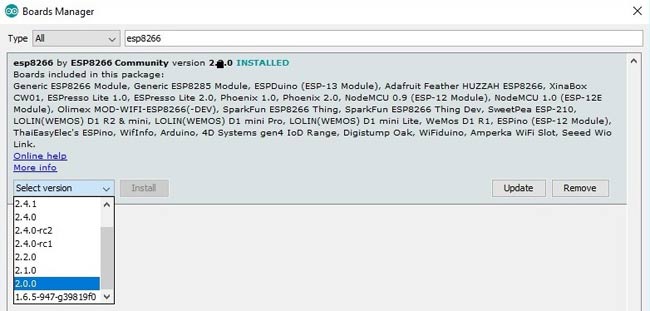
Step 2:- Click on Tools -> Board -> Board Manager. Search for ESP8266. You must select version 2.0.0. This code will work only for this version. If you have already installed another versions, remove it and install 2.0.0
Step 3:- Again go to File -> Preferences and click the folder path under More preferences.
Step 4:- Now, open the packages -> esp8266 -> hardware -> esp8266- > 2.0.0 -> tools -> sdk -> include
and open the user_interface.h file with the text editor.
Step 5:- Come to last line of the code and before #endif and add these lines:
typedef void (**freedom_outside_cb__t)(uint8 status);
int wifi_register_send_pkt_freedom_cb(freedom_outside_cb_t cb);
void wifi_unregister_send_pkt_freedom__cb(void);
 int wifi_send_pkt_freedom(uint8 **buf, int len, bool sys_seq);
Then Save the file.
Step 6:- Extract the library that you have downloaded earlier and open it. Open esp8266_deauther-master -> esp8266_deauther -> esp8266_deauther.ino
This is the sketch which will be uploaded in the NodeMCU. Compile this sketch. If there is a error then you have to install these libraries:
Now, your code is ready to upload. Connect NodeMCU to the PC, Choose NodeMCU esp-12E board from tools menu, choose the correct port and hit the upload button.
Running the NodeMCU Wi-Fi Jammer
Reset your ESP12 board after uploading the code and open the Serial Monitor.
You will see this information on serial monitor:
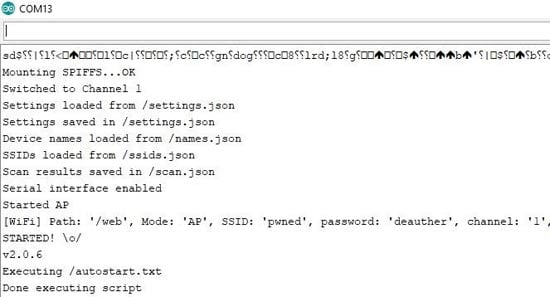
Step 1:- Now, connect your laptop or smartphone with Access Point created by NodeMCU. Name of AP is “pwned” and password is “deauther” These are default name and password which you can see on serial monitor .
Step 2:- Open your browser and enter this address 192.168.4.1 .
You will see a warning, read it and click on I have read and understood

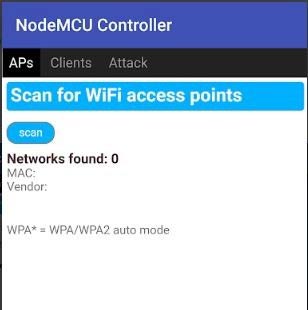
Step 3:- After this you will see the window given below. Click on Scan APs to search for the WiFi networks available. Now, click on Reload.
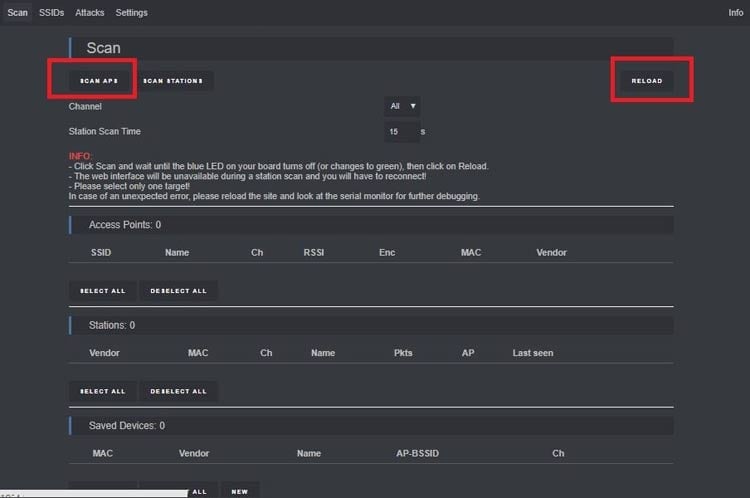
Step 4:- Click on the WiFi network which you want to Jam. You can choose more than one but it will make your NodeMCU unstable.

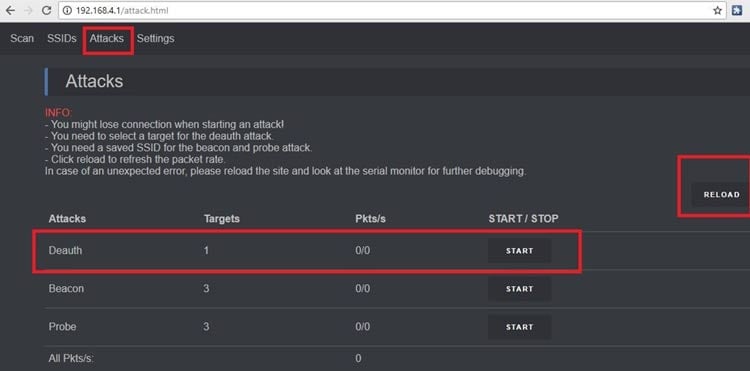
Step 5:- Click on Attacks and you will see that you have chosen one target for attack. To start the Attack click on start and then Reload.
You have successfully jammed the network. To stop the attack click on stop button.
Make a fake WiFi network
If you want to make fake WiFi networks i.e. Beacons. Click on SSIDs above and name the SSIDs as you want .Add and save it. Come back to Attacks menu and click on Start in front of Beacon.

You can check in your mobile or PC that wifi name that you have created will be displayed but it will not connect with this fake network it is just a WiFi spam.
Method 2: Uploading Firmware using ESP8266 flasher
Now, we will see the second method where we have to upload a firmware in ESP12 using Esp8266 flasher. It is easy to use and you don’t have to do any extra work or editing in sketch as we have done in previous method.
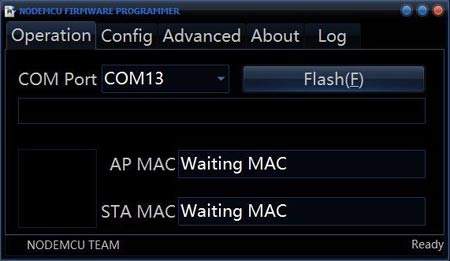
Step 1:- Open the esp8266flasher.exe file.
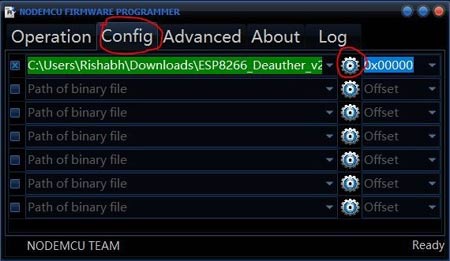
Step 2:- Click on Config and and then setting icon. Choose the .bin file that you have downloaded for your board and click on Operations.
Step 3:- Click on Flash and it will start your uploading process. Wait for few minutes and your firmware uploading is finished.
To run this firmware ,reset your nodemcu and all the steps for running the NodeMCU Wi-Fi Jammer are same as we have done in case of previous method using Arduino sketch.
As you can see this method is very easy and more stable than Arduino version. So, I’ll recommend using this method for better performance.
You can use mobile App instead of going to browser to access the portal.
Download the app from this link. Interface of this app is same as the webpage.
You can power your NodeMCU using your smartphone. For this you will need an OTG cable and your portable WiFi jammer is ready for work but use this device on your risk as already warned!!
So with readily available Code or Firmware, its become very easy to jam or overlaod any wifi netwrok so that nobody is able to connect with it, but again use it carefully.

i had create a project on arduino which is for fly drone..
but for few reason im not able to compile my program