
In this era of the Internet of Things (IoT), we use various embedded devices and systems to execute and obtain data from various fields. Whenever we talk about embedded and IoT devices, we always think about what microcontroller/microprocessor we have used and most importantly what kind of firmware we are going to use to obtain the data precisely, without any time latency. So, when it comes to time-latency in any embedded IoT project, we always choose an Embedded-OS that is better suited for that specific application that easily enhances the performances.
An embedded operating system is an operating system that is designed to be resource-efficient and reliable to perform a specific task for a device. In the open market, various Embedded OS are available (like FreeRTOS, μ-Clinux, ARMmbed, MONGOOSE-OS, RIOT-OS, etc). In the article, we will discuss RIOT-OS and its disruptive effects in the IoT industry. We already discussed some popular IoT devices available in the market and also developed many DIY projects based on IoT.
What is RIOT OS?
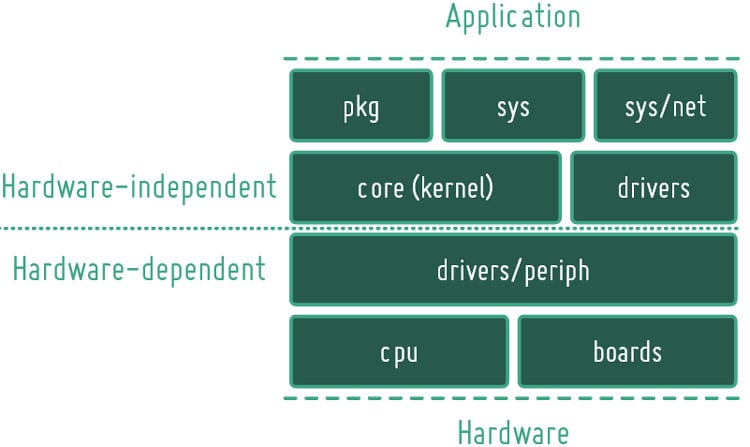
RIOT OS is a small operating system for embedded systems. This OS is a free open-source operating system, released under the GNU Lesser General Public License (LGPL) and developed by a grassroots community gathering companies, academia, and hobbyists, distributed all around the world. This OS supports low-power IoT devices, and various microcontrollers like 8-bit, 16-bit, and 32-bit and developed for memory-constrained systems with a focus on low-power wireless IoT devices.
Different Features Supported by IOT OS
The RIOT OS is a friendly OS for IoT applications and it has been actively developed and maintained since 2013. Some of its features include a free and open-source (LGPLv2.1) operating system, with the help of it, you can write your code in native languages like C and C++. It has Microkernel (μ-kernel) architecture (The Kernel uses ~1.5K RAM or 32-bit architecture). It has super low latency interrupt handling, and it supports module architecture for threading. It also supports different network stacks like 6LoWPAN, IPV6, RPL, UDP, TCP, LoRaWAN, 802.15.4, MQTT, and much more. It also supports different PHY technologies (like Bluetooth, NFC, serial, CAN, etc). It also, support 3rd party packages (like lwIP Stack, uIP, Open-thread stack). Other than the mentioned features, it also supports various 32-bit platforms and also supports 16-bit & 8-bit platform (like Arduino Nano/Uno, MSP430, x86, ARM, MIPS, AVR, etc)
RIOT OS provides different types of example source codes. So, we can easily develop our code by using those example codes. But the major benefit of using this OS is “Code your application once & run everywhere”, it means, when we write a code for Arduino/ESP, that code now can run onto a different microcontrollerss to do the same operation without changing anything into the code or configuration.
Installing RIOT OS in a Linux Based System
Once we understand what RIOT OS is, we need a setup environment to develop applications using RIOT OS. For setting up a RIOT OS environment. We recommend using a Linux/macOS-based system because the support of Microsoft Windows is under development.
Getting Started with RIOT OS on Linux:
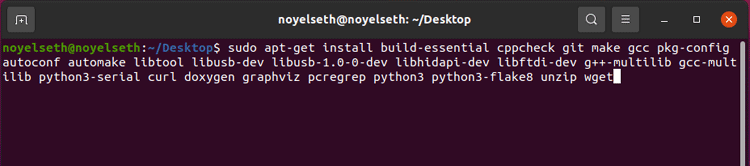
So, first, we use Ubuntu 20.04.2 LTS-64bit, and to create the development environment, we need to install the prerequisite before setting up the RIOT OS.
sudo apt-get update && sudo apt-get upgrade

sudo apt-get install build-essential cppcheck git make gcc pkg-config autoconf automake libtool libusb-dev libusb-1.0-0-dev libhidapi-dev libftdi-dev g++-multilib gcc-multilib python3-serial curl doxygen graphviz pcregrep python python3 python3-flake8 unzip wget
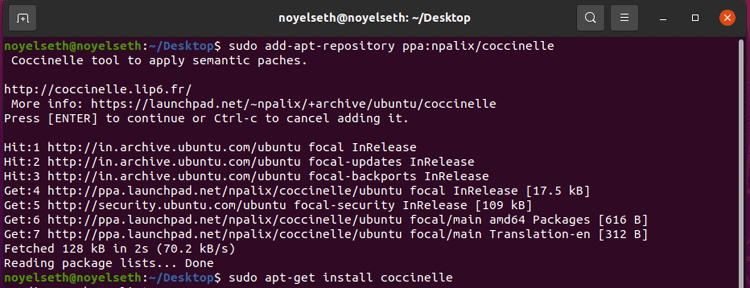
sudo add-apt-repository ppa:npalix/coccinelle
sudo apt-get install coccinelle
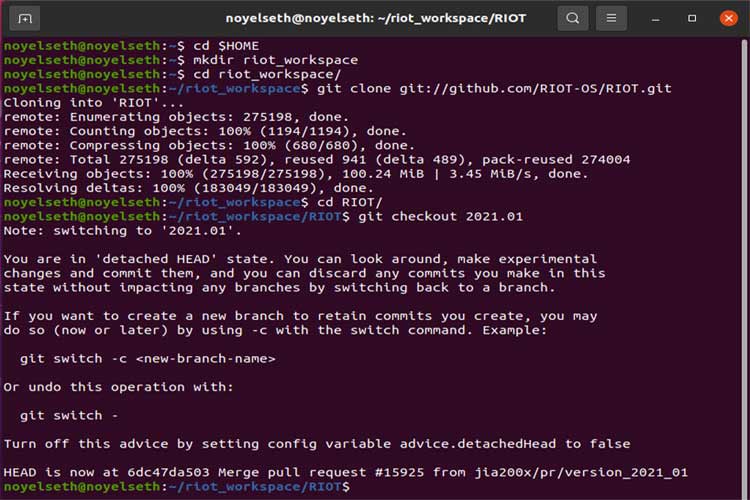
After installing all requirements, now we can set up the RIOT OS. For that, we need to create a workspace folder for download and git clone the latest release of RIOT OS. To do this, follow these steps:
cd $HOME
mkdir riot_workspace
cd riot_workspace/
git clone git://github.com/RIOT-OS/RIOT.git
cd RIOT/
git checkout 2021.01
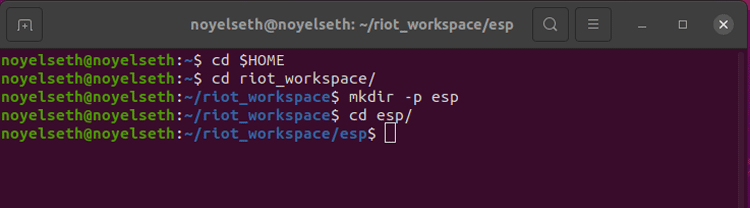
Now it’s time to set up the Hardware Toolchain, depending on the hardware you want to use. Today, in our case, we use ESP8266 for demonstrating the RIOT OS example. For the ESP8266 toolchain, we need to create a folder named “esp”.
cd $HOME
cd riot_workspace/
mkdir -p esp
cd esp/
So, after creating the hardware-specific folder, now it’s time to download the toolchain and cross-compiler for ESP8266.
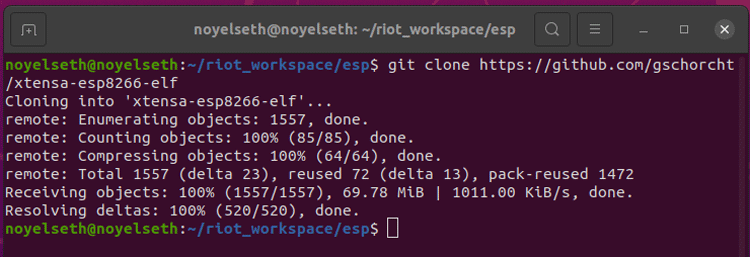
Download the Xtensa GCC compiler suite:
Mkdir -p $HOME/riot_workspace/esp
cd $HOME/riot_workspace/esp
git clone https://github.com/gschorcht/xtensa-esp8266-elf
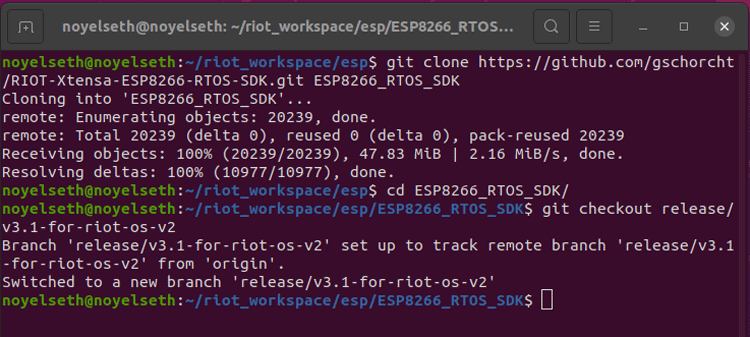
Download the ESP8266 RTOS SDK:
mkdir -p $HOME/riot_workspace/esp
cd $HOME/riot_workspace/esp
git clone https://github.com/gschorcht/RIOT-Xtensa-ESP8266-RTOS-SDK.git ESP8266_RTOS_SDK
cd ESP8266_RTOS_SDK/
git checkout release/v3.1-for-riot-os-v2
To use the ESP8266 Xtensa compiler and ESP8266 RTOS SDK, we need to set an environment variable.
[Note: We need to set these two environment variables whenever we develop an ESP8266 RIOT OS base application]
a) For Xtensa GCC compiler
export PATH=$HOME/riot_workspace/esp/xtensa-esp8266-elf/bin:$PATH
b) For ESP8266 RTOS SDK
export ESP8266_RTOS_SDK_DIR=$HOME/riot_workspace/esp/ESP8266_RTOS_SDK
Build/Flash a “Hello World” example for ESP8266:
After completing the installation of the RIOT OS & ESP8266 Toolchain, it is time to build an example for ESP8266. So, we need to navigate to folder RIOT/examples/hello-world and set the upper mention environment variables.
cd $HOME/riot_workspace/RIOT/examples/hello-world
export PATH=$HOME/riot_workspace/esp/xtensa-esp8266-elf/bin:$PATH
export ESP8266_RTOS_SDK_DIR=$HOME/riot_workspace/esp/ESP8266_RTOS_SDK

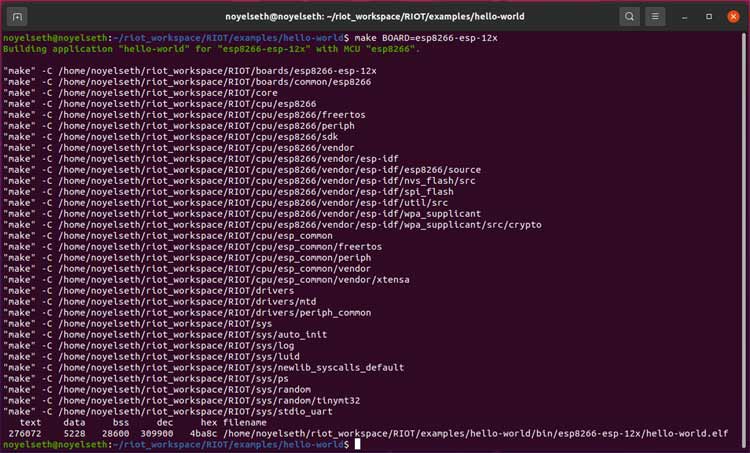
Now is the time to build the application. So we need to call make command along with BOARD argument. In our case, we use ESP8266 Dev Board, so the board’s value is “esp8266-esp-12x”. If you use a different board, then please check the path [$HOME/riot_workspace/RIOT/boards] for the supported board’s list.
make BOARD=esp8266-esp-12x
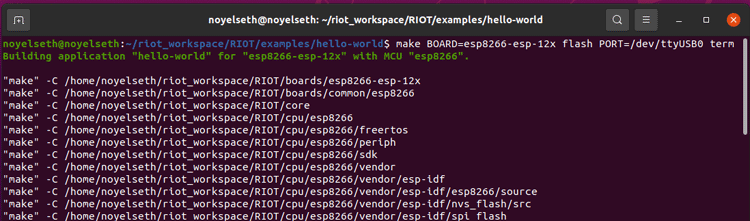
Now, Flash the newly built Hello_world Example into ESP8266. For flash, the code we need to call this command.
make BOARD=esp8266-esp-12x PORT=/dev/ttyUSB0 flash term
[Note: If any error come like “Permission denied: '/dev/ttyUSB0'” then call this command to resolve this “sudo chmod a+rw /dev/ttyUSB0”]
After getting this message “Type '/exit' to exit.” press the “RST” button of the ESP8266 dev board to get the log on the screen.

Benefits of using RIOT OS in Embedded and IoT Based Systems
Nowadays, what we see, what we hold, are all directly indirectly connected with the Internet. So, IoT devices are easily available for everyone and development is also becoming easy with the help of the development environment RIOS OS.
By the use of RIOT OS, we can easily customize our project, there is no need to develop a different type of network-connected device to complete an operation. It also minimizes human interaction effort by interacting between IoT devices using the RIOT OS network stack. RIOT OS is a real-time operating system for that reason, it saves time between any operations, which is very important for IoT projects.
And of course, the most important is security. So, RIOT OS is embedded with DTLS transport layer security, IEEE 802.15.4 encryption, Secure Firmware Updates (SUIT), multiple cryptographic packages, and crypto secure elements.
