
Introduction
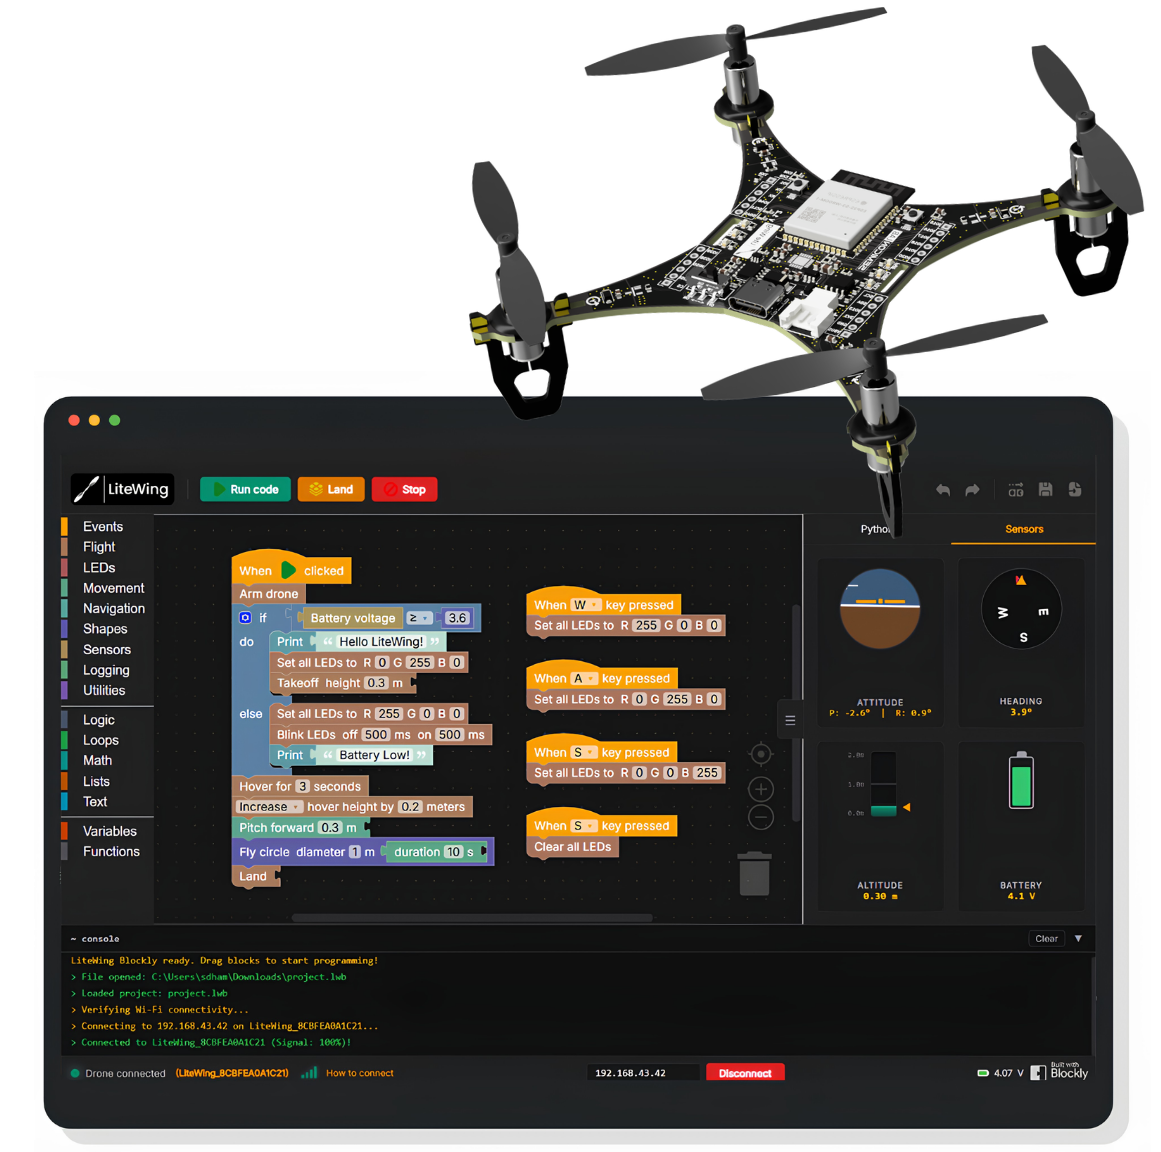
LiteWing Blockly is a visual programming app for the LiteWing Drone. Instead of writing every command by hand, you build programs by joining blocks together. The app shows the Python code created from your blocks, so learners can learn programming concepts while they create real drone programs.
LiteWing Blockly is fully portable. The Python, LiteWing library, and the app dependencies are included with the application. You do not need to install Python or any separate programming packages before using the app.
Requirements
You need the following items before using LiteWing Blockly:
| Requirement | Details |
|---|---|
| LiteWing Drone | A LiteWing Drone & Positioning Module is required for LiteWing Blockly. The app uses the module’s Time of Flight height sensor and optical flow sensor for stable height hold, position hold, telemetry, and autonomous flight commands. |
| LiteWing Drone Positioning Module | |
| Firmware | LiteWing firmware version v3.0.0 or later. |
| System | A Windows PC (64-bit) or Mac (Apple Silicon) with Wi-Fi. |
Before continuing, install the Drone Positioning Module and update the LiteWing firmware. Check the Drone Positioning Module installation guide and the LiteWing firmware update guide before proceeding.
Download LiteWing Blockly
After downloading, open LiteWing Blockly. The app opens with the programming workspace, a console, and a connection bar along the bottom of the window.
Standalone application for Windows (64-bit) and macOS (Apple Silicon). Python 3.10 and LiteWing drivers pre-installed.

Get familiar with the app
Spend a few minutes exploring the application before you connect or fly. This makes it easier to understand where blocks go and where the app reports connection and flight information.
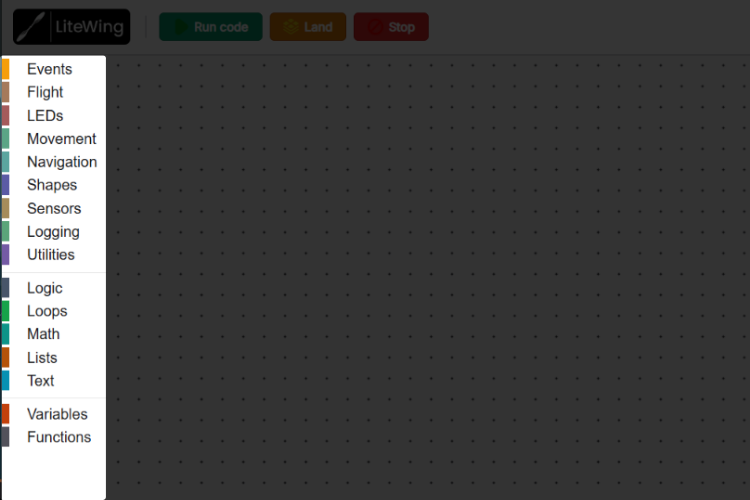
Category toolbox
The category toolbox is the vertical list on the left side of the app. It groups blocks by purpose, making it easier to find the command or value you need. Select a category such as Flight, LEDs, or Sensors to view the blocks available in that group.
Flyout toolbox
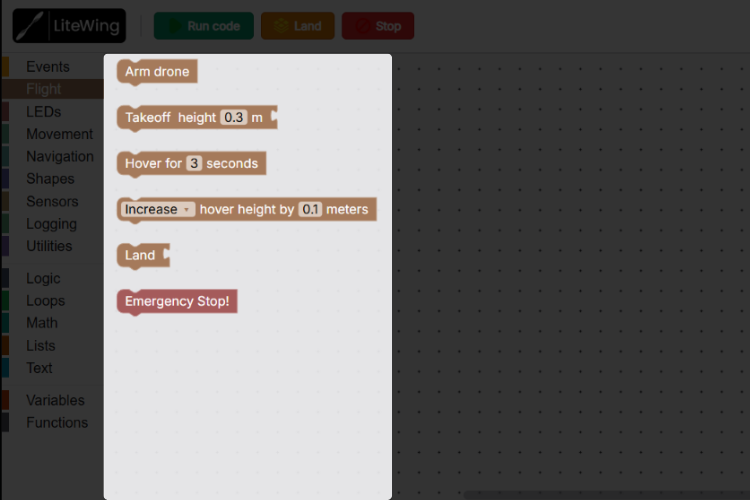
The flyout toolbox opens beside the category toolbox after you select a category. It displays the individual blocks in that category. Drag a block from this panel into the workspace to begin building your program. The flyout changes whenever you choose a different category.
Workspace
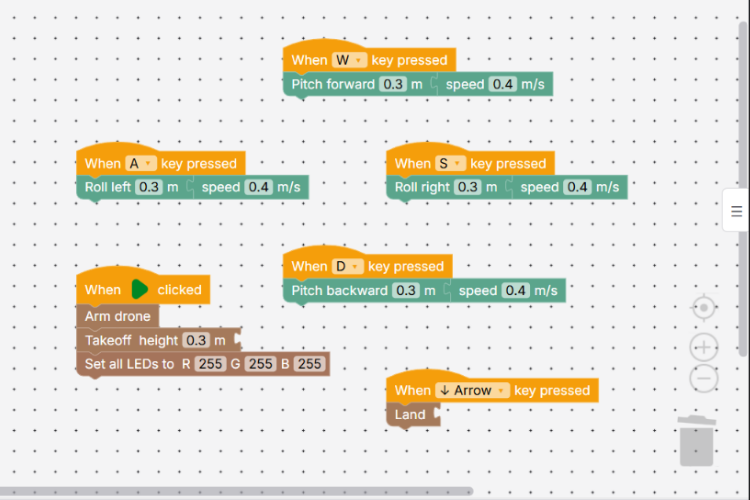
The workspace is the large dotted area in the middle of the window. This is the main programming area, where you drag in blocks, connect them into stacks, move them around, and organise your program. Blocks connected in a vertical stack run from top to bottom.
| Control | Function |
|---|---|
| Zoom in (+) | Makes blocks larger for easier viewing and editing. |
| Zoom out (-) | Gives you more workspace area when working with a large program. |
| Centre / Reset | Returns the workspace to a comfortable default view. |
| Trashcan | Deletes a block or connected block stack dropped onto it. Opening the trashcan can also display recently deleted blocks. |
Python panel
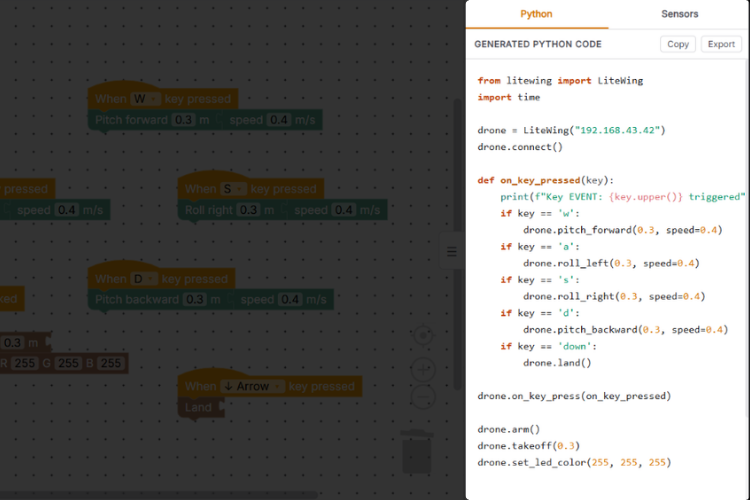
The Python panel shows the Python code generated from the blocks in your workspace. It updates whenever you add, remove, or change a block. Use it to see how visual Blockly instructions translate into Python commands and understand what each block means in Python. Use Copy to copy the generated code or Export to save it as a Python file.
Sensors panel
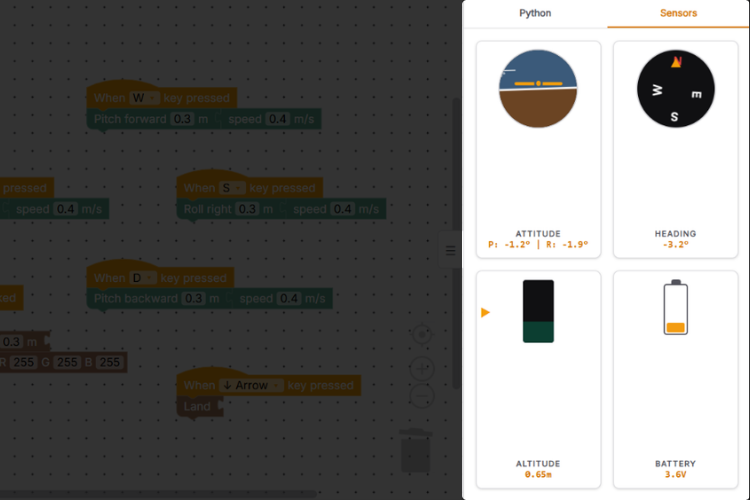
The Sensors panel displays live telemetry from the drone after it has been connected successfully. Depending on the available sensors, it can show information such as battery voltage, height, attitude, heading, and position. Check this panel before flight to confirm that live data is being received.
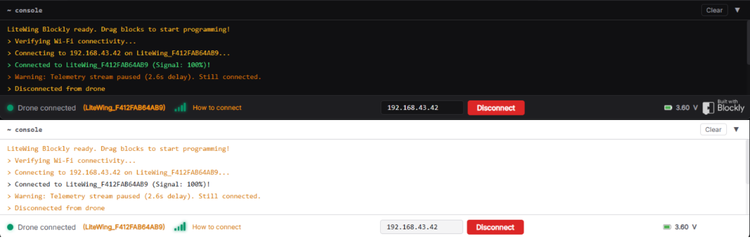
Console
The console displays text feedback from the app and your program. It shows connection messages, program output, warnings, and errors. If a connection or program does not work as expected, check the console first for useful details.

Status bar
The status bar is at the bottom of the app window. It shows whether the drone is connected, displays the drone IP address, SSID name, connection strength, and battery voltage, and contains the Connect or Disconnect button. Confirm that the connection status is green before running a drone program.
Toolbar controls
Drone controls

Run code
Select Run code to start the program connected below a When Run clicked block. The app checks for a drone connection before it sends flight commands, so make sure the connection status is green and telemetry is available before running a flight program.
Land
Select Land to command a controlled landing and stop the active flight program. Use this button when the drone needs to finish a normal flight safely. Use this control rather than Stop whenever the situation is not an emergency.
Stop
Select Stop only in an emergency. It immediately cuts power to the motors, causing the drone to fall rather than land under control. The Spacebar performs the same emergency stop, which can be useful when you need to react quickly.
App and workspace controls


Undo and Redo
Use Undo to reverse the most recent change in the Blockly workspace, such as moving, deleting, connecting, or editing a block. Use Redo to restore a change that was undone. These controls affect the workspace only, they do not reverse a program that has already run on the drone.
Theme
Use Theme to switch between the Light & Dark app colour themes. This changes the appearance of the LiteWing Blockly interface but does not change your blocks, generated Python code, connection settings, or saved projects.
Save
Use Save to store the current Blockly workspace as a .lwb LiteWing Blockly project file. The saved project keeps the block arrangement, block settings, variables, and comments so you can continue working later. Save regularly, especially before closing the app or making major changes to a working flight program.
Load
Use Load to open a previously saved .lwb LiteWing Blockly project file. Loading a project restores its saved workspace so you can review, edit, test, or run the program again. Check the blocks, connection status, and flight area before running a loaded drone program.
Context menu
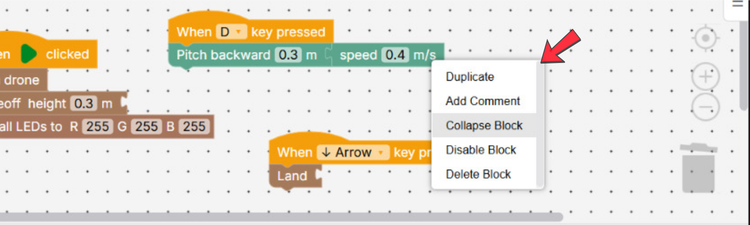
Context menu opens when you right-click a block or the empty workspace. It can duplicate a block, add a comment, change input layout, collapse or disable a block, delete a block, or clean up loose stacks.
Blockly programming basics
Blocks and block stacks
A block represents one instruction, value, or event. A block stack is a vertical or horizontal sequence of connected command blocks. The program runs from the top of the stack to the bottom.
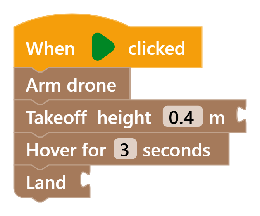
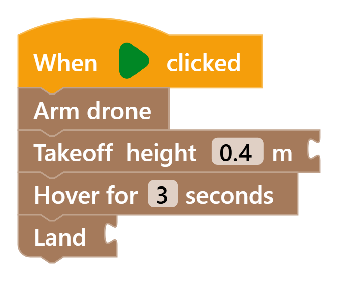
For example, a basic flight stack connects When Run clicked, Arm drone, Takeoff, Hover, and Land sequentially.
Insertion marker
When you drag a compatible block near a connection point, Blockly shows an insertion marker. The marker shows where the block will be placed when you release it. Use the marker to insert a command between two existing commands without breaking the stack.
Connection types
| Connection | Block | Description | Example |
|---|---|---|---|
| Next connection |  |
A notch at the bottom of a command block. It accepts the next command. | Arm drone followed by Takeoff. |
| Previous connection |  |
A notch at the top of a command block. It connects below the previous command. | Land below Hover. |
| Output connection |  |
A rounded or angled plug that supplies a value. | Battery voltage used in a comparison. |
| Statement input |  |
A socket that receives a value or stack of blocks. | Waypoints inside Fly path or commands inside a loop. |
Block icons and editable values
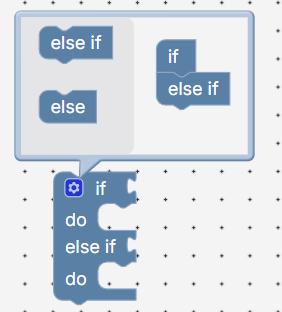
The gear icon gives additional conditional logic, you can drag the logic you wanted into the existing field to modify the block structure. In number fields such as 0.3, drop-down menus such as Increase, and text fields such as flight_log.csv are editable. Click a field, enter a suitable value, and press Enter.

Some inputs contain a light-coloured shadow block. A shadow block is a safe default value. You can edit it or replace it by dropping another compatible value block into the same socket.
Safety before flight
Read these safety instructions before running any program on the LiteWing drone.
- Place the drone on a flat, well-lit, textured floor. The optical flow sensor needs visible surface texture to track horizontal movement reliably.
- Check that the propellers rotate freely and are free of hair, dust, or damage.
- Use a charged battery. Do not start a flight when the battery is low.
- Keep a clear landing area below the drone throughout the program.
- Use Land for a normal, controlled landing. Use Stop or Spacebar only when continued flight is unsafe. Stop cuts motor power immediately, so the drone drops.
Connect LiteWing Blockly to the Drone

To connect LiteWing Blockly to the drone, first place LiteWing on a flat surface and power it on. Allow the drone to complete its normal startup process before continuing.
On the computer, open the Wi-Fi settings and connect to the LiteWing Wi-Fi network. And you can verify this by the drone position module indication turned solid green, launch the LiteWing Blockly application and check the drone IP address shown in the connection bar. The normal default IP address is 192.168.43.42. Select Connect and wait for the application to verify the connection. Once the connection is established, LiteWing Blockly will begin receiving telemetry data from the drone.
A successful connection is confirmed when the connection status changes to Drone connected, with the status indicator turning green. The console should also report successful connection activity, while the Sensors tab begins displaying live telemetry data. The drone link indicator will flash while the application remains connected to LiteWing.

If the console reports that the computer is not connected to the LiteWing Wi-Fi network, return to the computer’s Wi-Fi settings and connect to the drone’s network. Once connected, return to LiteWing Blockly and select Connect again.
First programs
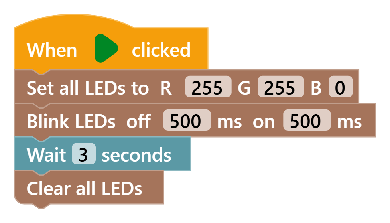
Connection Test
Use an LED program before any flight program. Verify that the app can connect to LiteWing and run code.
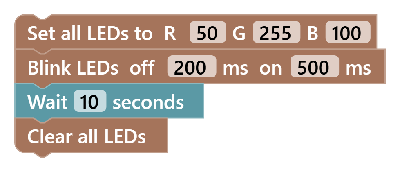
Select Run code. The LEDs should turn blue, blink for three seconds, and then turn off. If this does not happen, check the console and connection status before continuing.
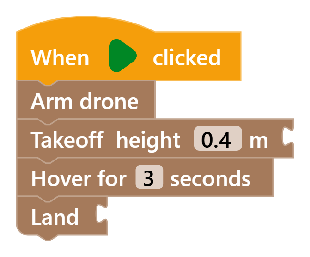
First controlled flight
Use this program only after the LED test works and the flight area is clear.
This program arms the drone, takes off to 0.3 m, holds position for three seconds, and lands. Keep one hand ready to use Land or, only in an emergency, Stop or Spacebar.
LiteWing block reference
The sections below describe every LiteWing-specific block in the app. Each entry explains the block’s purpose, the Python instruction created by the app, the values you can set, and a small example of where the block belongs in a program.
Most flight blocks are command blocks. They run once, then continue to the next block below them. Sensor and modifier blocks are value blocks. They supply information or settings to another block and do not run by themselves. Standard Blockly blocks are covered after the LiteWing blocks.
Events
When Run clicked
litewing_when_run
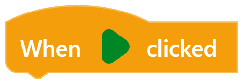
‘When Run clicked’ block starts a normal LiteWing Blockly program. Blocks connected below run from top to bottom when you select Run code. Think of it as the green flag for an autonomous mission, it tells the app where the main program begins.
Use one at the top of each flight program. You can arrange and store multiple programming block stacks in the same workspace at the same time.
By moving the blocks connected below When Run clicked, you can choose which programming block stack runs when you select Run code. This is useful when you want to keep several program ideas in one workspace but run only one at a time.
from litewing import LiteWing
import time

drone = LiteWing("192.168.43.42")
drone.connect()

# (No main sequence attached)

drone.disconnect()
Parameters: None.
Returns: None. It provides a connection for the command stack below it.
When key pressed
litewing_when_key
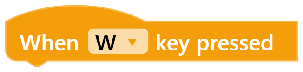
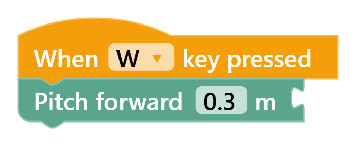
‘When key pressed’ block sets up an asynchronous keyboard teleoperation handler. When you press the configured key on your physical keyboard while the LiteWing Blockly window is active, the attached sub-routine runs immediately.
Unlike a normal top-to-bottom stack, a key-event stack waits for the chosen key instead of running once and ending. This makes it useful for interactive programs.
from litewing import LiteWing
import time

drone = LiteWing("192.168.43.42")
drone.connect()

def on_key_pressed(key):
    print(f"Key EVENT: {key.upper()} triggered")
    if key == 'w':
        pass

drone.on_key_press(on_key_pressed)

# (No main sequence attached)
# Keeping script alive for key events
while drone.is_connected:
    time.sleep(0.5)

drone.disconnect()| Parameter | Type | Options | Default |
|---|---|---|---|
| KEY | Dropdown | W, A, S, D, Q, E, R, F, Arrow Keys | W |
Returns: None. It provides a connection for commands below it.
Flight Commands
Arm drone
litewing_arm
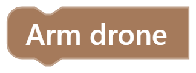
Arm drone block prepares the drone for flight. It tells the connected LiteWing controller that the program is about to use flight commands and gives the flight system a chance to confirm that it is ready for takeoff. An arming does not lift the drone or make it move by itself.
An Arm drone block must be used before a Takeoff block. Place it after any LED-ready indication or logging setup and immediately before the first takeoff in a basic program.
drone.arm()Parameters: None
Returns: None
Takeoff
litewing_takeoff

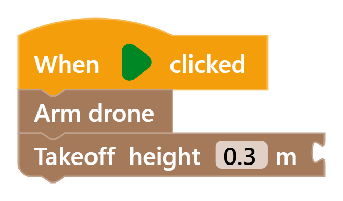
Takeoff block makes the drone take off. The LiteWing Drone rises to the selected height above the ground, using the Drone Positioning Module’s downward-facing height sensor as part of the height-hold system. A Takeoff block must be used after an Arm drone and before any flight movement.
Takeoff is an autonomous command, not a manual throttle control. After reaching the selected height, use Hover or another flight command to define what happens next.
drone.takeoff(height) or drone.takeoff(height, duration)| Parameter | Type | Default | Range | Units |
|---|---|---|---|---|
| HEIGHT | Number field | 0.3 | 0.2 to 1.0 | meters (m) |
| DURATION | Value input (optional) | None | Any Number block or litewing_duration | seconds (s) |
Returns: None.
Hover
litewing_hover

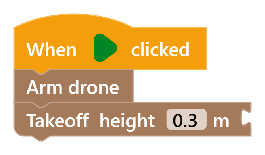
Hover block makes the drone hold its current position for a chosen time. The Drone Positioning Module uses its height sensor and optical-flow sensor to help the drone maintain a stable hover.
During a hover, the height sensor measures distance to the ground while the optical-flow sensor measures movement across the floor texture. The flight controller uses these measurements to correct small height and position changes. A plain, dark, glossy, or poorly lit floor can reduce optical-flow accuracy.
drone.hover(seconds)| Parameter | Type | Default | Range | Units |
|---|---|---|---|---|
| SECONDS | Number field | 3 | 3 to 60 | seconds (s) |
Returns: None.
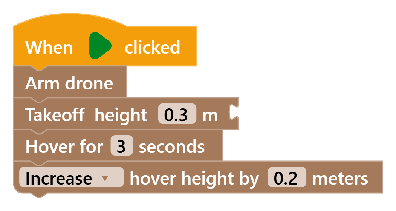
Change height
litewing_change_height

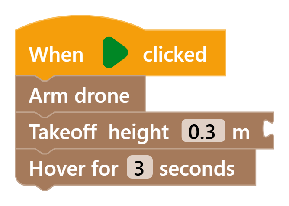
This block changes the current hover height by a relative amount. It does not set an absolute height. For example, if LiteWing is hovering at 0.3 m, increasing height by 0.1 m requests a new height of about 0.4 m.
Use this block after takeoff while the drone is already in a stable hover. It is useful for simple step-up and step-down activities, but large changes are not recommended for a first indoor program.
drone.change_height(delta, min_h=0.15, max_h=2.5)| Parameter | Type | Default | Options / Range | Units |
|---|---|---|---|---|
| DIRECTION | Dropdown | Increase | Increase (+1.0), Decrease (-1.0) | – |
| AMOUNT | Float | 0.1 | 0.1 to 1.0 | meters (m) |
Returns: None.
Land
litewing_land

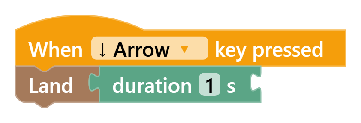
Land block makes the drone descend in a controlled way and stop its motors after touchdown. Put a Land block at the end of every flight program.
Land is the normal way to finish a flight because it requests a controlled descent. It is different from Emergency Stop, which removes motor power immediately.
drone.land() or drone.land(duration)| Parameter | Type | Default | Range | Units |
|---|---|---|---|---|
| DURATION (optional) | Value input (Float) | 1 | 0.1 to 10 | seconds (s) |
Returns: None.
Emergency stop
litewing_emergency_stop

This block immediately cuts motor power. The drone will fall, so this block is only for an emergency such as an imminent collision, propeller entanglement, or loss of safe control.
Emergency Stop is deliberately different from a landing command. It prioritises stopping the propellers over maintaining altitude, which is why it should never be used as the usual last block of a flight program.
drone.emergency_stop()Parameters: None.
Returns: None.
LEDs & Lights Commands
Set all LEDs color
litewing_set_led_color

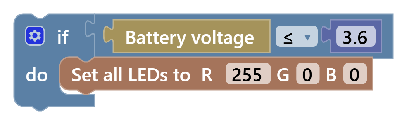
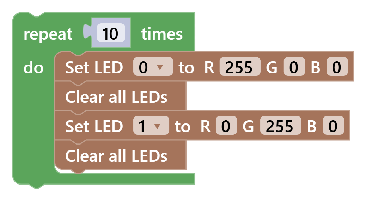
This block sets all four LEDs on the Drone Positioning Module to one RGB colour. It is useful for a safe connection test or for showing a program state, such as green for ready, blue for connected, or red for a warning.
RGB colour uses three light levels: red, green, and blue. A value of 0 turns that colour channel off and 255 gives its highest intensity. Combining channels creates other colours, such as yellow from red 255, green 255, and blue 0\.
drone.set_led_color(r, g, b)| Parameter | Default | Range | Description |
|---|---|---|---|
| R | 0 | 0 to 255 | Red channel intensity. |
| G | 255 | 0 to 255 | Green channel intensity. |
| B | 0 | 0 to 255 | Blue channel intensity. |
Returns: None.
Set single LED
litewing_set_led

This block sets one selected LED to an RGB colour. The LED index identifies one of the four LEDs on the Drone Positioning Module, allowing a program to create patterns instead of using a single all-LED colour.
drone.set_led(index, r, g, b)| Parameter | Type | Default | Range | Description |
|---|---|---|---|---|
| INDEX | Dropdown | 0 | 0, 1, 2, 3 | Index of the target LED on the drone arms. |
| R | Number field | 255 | 0 to 255 | Red channel intensity. |
| G | Number field | 0 | 0 to 255 | Green channel intensity. |
| B | Number field | 0 | 0 to 255 | Blue channel intensity. |
Returns: None.
Blink LEDs
litewing_blink_leds

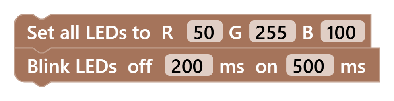
This block makes all LEDs blink using the selected off and on times. The off time tells the app how long the LEDs stay dark, the on time tells it how long the LEDs stay illuminated.
drone.blink_leds(off_ms, on_ms)| Parameter | Type | Default | Range | Units | Description |
|---|---|---|---|---|---|
| OFF_MS | Number field | 500 | 50 to 5000 | ms | Milliseconds LEDs stay turned OFF per cycle. |
| ON_MS | Number field | 500 | 50 to 5000 | ms | Milliseconds LEDs stay turned ON per cycle. |
Returns: None.
Clear all LEDs
litewing_clear_leds
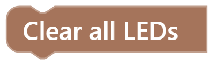
This block turns all four LEDs off. Use it to finish a visual test cleanly or to remove a status colour after a program is complete.
drone.clear_leds()Parameters: None.
Returns: None.
Movement Commands
Movement blocks are flight commands. Use them only after Arm drone and Takeoff. A speed value can be placed in the open socket of a movement block.
These are distance-based commands, not continuous joystick controls. The drone completes the requested movement, then the next block in the stack runs. Begin with short distances and add a Hover block after a movement when you want the drone to settle before the next command.
Pitch forward
litewing_pitch_forward
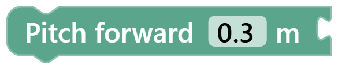
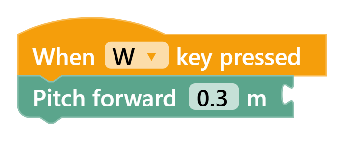
Pitch forward block moves the drone forward along its longitudinal X-axis by the selected distance. “Forward” means the direction LiteWing is facing when the command runs, so a rotation changes the direction of a later forward command.
drone.pitch_forward(distance) or drone.pitch_forward(distance, speed=value)| Parameter | Type | Default | Range | Units | Description |
|---|---|---|---|---|---|
| DISTANCE | Number field | 0.3 | 0.1 to 2.0 | meters (m) | Linear distance to translate forward. |
| SPEED (optional) | Value input | None | 0.1 to 2.0 | m/s | Optional translation velocity. Defaults to 0.2 m/s. |
Returns: None.
Pitch backward
litewing_pitch_backward

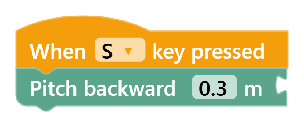
Pitch backward block moves the drone backward along its longitudinal X-axis by the given distance.
drone.pitch_backward(distance) or drone.pitch_backward(distance, speed=value)| Parameter | Type | Default | Range | Units | Description |
|---|---|---|---|---|---|
| DISTANCE | Number field | 0.3 | 0.1 to 2.0 | meters (m) | Linear distance to translate backward. |
| SPEED (optional) | Value input | None | 0.1 to 2.0 | m/s | Optional translation velocity. Defaults to 0.2 m/s. |
Returns: None.
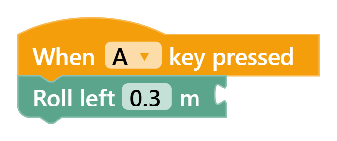
Roll left
litewing_roll_left
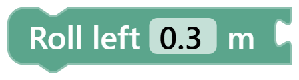
Roll left block moves the drone laterally to the left along its transverse Y-axis by the selected distance. Left and right are relative to the drone’s current heading, not to the person watching it from the side of the room.
drone.roll_left(distance) or drone.roll_left(distance, speed=value)| Parameter | Type | Default | Range | Units | Description |
|---|---|---|---|---|---|
| DISTANCE | Number field | 0.3 | 0.1 to 2.0 | meters (m) | Linear distance to translate leftward. |
| SPEED (optional) | Value input | None | 0.1 to 2.0 | m/s | Optional translation velocity. Defaults to 0.2 m/s. |
Returns: None.
Roll right
litewing_roll_right
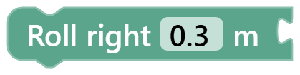
Roll right block moves the drone laterally to the right along its transverse Y-axis by the selected distance. Plan enough space on both sides of the flight area before using this block.
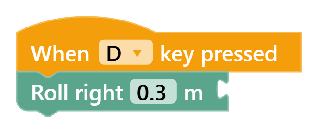
drone.roll_right(distance) or drone.roll_right(distance, speed=value)| Parameter | Type | Default | Range | Units | Description |
|---|---|---|---|---|---|
| DISTANCE | Number field | 0.3 | 0.1 to 2.0 | meters (m) | Linear distance to translate rightward. |
| SPEED (optional) | Value input | None | 0.1 to 2.0 | m/s | Optional translation velocity. Defaults to 0.2 m/s. |
Returns: None.
Rotate left (Yaw)
litewing_rotate_left

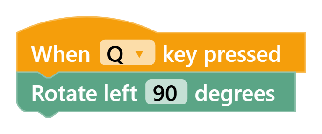
This block rotates the drone counter-clockwise around its vertical axis. Rotation is also called yaw, it changes where the front of the drone points without asking it to travel forward or sideways.
drone.rotate_left(degrees)| Parameter | Type | Default | Range | Units |
|---|---|---|---|---|
| DEGREES | Number field | 90 | 0 to 360 | Degree |
Returns: None.
Rotate right (Yaw)
litewing_rotate_right

This block rotates the drone clockwise around its vertical axis. Use modest angles such as 45 or 90 degrees while learning, then allow the drone to stabilise before the next movement.
drone.rotate_right(degrees)| Parameter | Type | Default | Range | Units |
|---|---|---|---|---|
| DEGREES | Number field | 90 | 0 to 360 | Degree |
Returns: None.
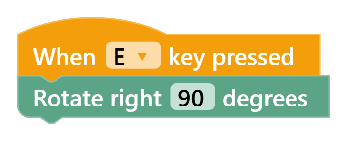
Navigation Commands
Navigation blocks work from the launch reference point. In the coordinate system used by LiteWing, positive X is forward, negative X is backward, positive Y is left, and negative Y is right.
Unlike a simple Pitch or Roll movement, a navigation command asks LiteWing to reach a named location. The X and Y values are measured in metres from the point where the flight began. Begin with a small coordinate such as X 0.3, Y 0.0 before creating larger paths.

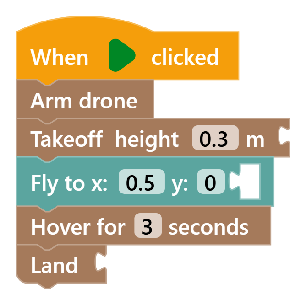
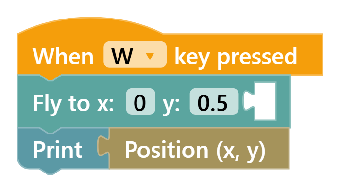
This block makes the drone fly to a selected X and Y coordinate. You can add Z, rotation, and speed modifier blocks to the open parameter socket.
For example, X 0.5 and Y 0.0 asks LiteWing to fly about half a metre forward from the launch point. X 0.0 and Y 0.3 asks it to move about 0.3 m left. The block can be used repeatedly to build a route one target at a time.
drone.fly_to(x, y, z, yaw, speed=value)| Parameter | Type | Default | Range | Units | Description |
|---|---|---|---|---|---|
| X | Number field | 0.0 | -5.0 to 5.0 | meters (m) | Forward/backward displacement (+X = forward). |
| Y | Number field | 0.0 | -5.0 to 5.0 | meters (m) | Left/right displacement (+Y = left). |
| Z | Number field(optional) | 0.3 | 0.3 to 2.0 | meters (m) | Up/down displacement (+Z = up). |
| YAW | Number field(optional) | 90 | -360 to 360 | degrees | Rotation (deg) |
| SPEED | Number field(optional) | 0.2 | 0.1 to 2 | m/s | Navigation speed (m/s) |
Returns: None.
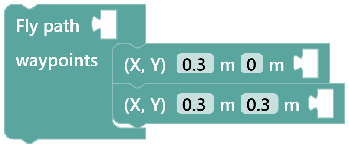
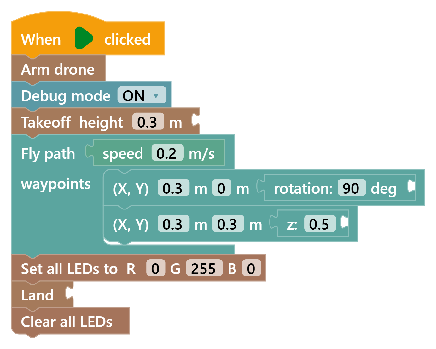
This block makes the drone visit a sequence of waypoint blocks. Place waypoint blocks inside its waypoints area and optionally attach a speed value.
The waypoint stack is read from top to bottom. Each waypoint becomes one coordinate in the generated Python path list, so the order of the blocks is the order in which LiteWing visits the locations.
drone.fly_path(path_points, speed=value)| Parameter | Type | Default | Description |
|---|---|---|---|
| SPEED | Value input | None | Optional traversal velocity modifier. |
| WAYPOINTS | Statement input | Pre-populated 2 waypoints | Contains one or more litewing_waypoint blocks snapped in sequence. |
Returns: None.
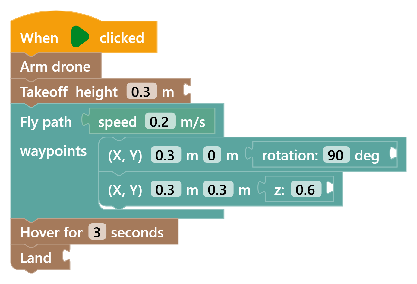
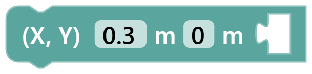
This block defines X and Y points inside a Fly path block. It can accept Z and rotation modifiers. It is not a free-standing flight command, it only belongs inside the waypoint area of a Fly path block.
(0.3, 0.0, 0.3) # Waypoint coordinate tuple (X, Y, Z)| Parameter | Type | Default | Range | Units | Description |
|---|---|---|---|---|---|
| X | Number field | 0.0 | -5.0 to 5.0 | meters (m) | Forward/backward displacement (+X = forward). |
| Y | Number field | 0.0 | -5.0 to 5.0 | meters (m) | Left/right displacement (+Y = left). |
| Z | Number field(optional) | 0.3 | 0.3 to 2.0 | meters (m) | Up/down displacement (+Z = up). |
| YAW | Number field(optional) | 90 | -360 to 360 | degrees | Rotation (deg) |
Returns: a waypoint statement that connects inside the Fly path.
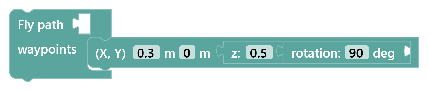
Shapes Commands
Shape blocks create predefined flight paths. Use them after takeoff. A duration block and a Face flight direction block can be connected to their parameter socket.
These blocks are a convenient introduction to autonomous flight patterns. They still require a clear flight area larger than the shape itself. Measure the available space before choosing a side length or diameter.
Fly square
litewing_square

This block makes the drone fly a square path. The specified length determines the distance of each side of the square. It generates and executes a four-sided trajectory, returning the drone to its original hover position after completing the pattern.
drone.square(length=value, duration=value, face_direction=value)| Parameter | Type | Default | Range | Units | Description |
|---|---|---|---|---|---|
| LENGTH | Number field | 0.6 | 0.2 to 3.0 | meters (m) | Length of each side of the square. |
| DURATION | Value input | 1 | 0.1 to 10 | seconds (s) | Time period (s) |
| FACE_DIRECTION | Bool | True | – | – | Heading behavior |
Returns: None.

Fly triangle
litewing_triangle

This block enables the drone to fly an equilateral triangle path. The specified length determines the distance of each equal side. It generates and executes a precise three-sided trajectory with 60° interior turns, returning the drone to its original hover position after completing the pattern.
drone.triangle(length=value, duration=value, face_direction=value)| Parameter | Type | Default | Range | Units | Description |
|---|---|---|---|---|---|
| LENGTH | Number field | 0.6 | 0.2 to 3.0 | meters (m) | Length of each side of the triangle. |
| DURATION | Value input | 1 | 0.1 to 10 | seconds (s) | Time period (s) |
| FACE_DIRECTION | Bool | True | – | – | Heading behavior |
Returns: None.

Fly circle
litewing_circle

This block directs the drone along a smooth circular trajectory. Set the diameter in meters to determine the circle’s overall width, and ensure there is enough open space for the drone to complete the maneuver safely.
drone.circle(diameter=value, duration=value, face_direction=value)| Parameter | Type | Default | Range | Units | Description |
|---|---|---|---|---|---|
| DIAMETER | Number field | 1.0 | 0.3 to 3.0 | meters (m) | Overall width of circle. |
| DURATION | Value input | 1 | 0.1 to 10 | seconds (s) | Time period (s) |
| FACE_DIRECTION | Bool | True | – | – | Heading behavior |
Returns: None.

Fly pentagon
litewing_pentagon

This block makes the drone fly in a regular pentagon pattern. The Length value specifies the length of each side, allowing the drone to trace a five-sided polygon with equal-length sides.
drone.pentagon(length=value, duration=value, face_direction=value)| Parameter | Type | Default | Range | Units | Description |
|---|---|---|---|---|---|
| LENGTH | Number field | 0.6 | 0.2 to 3.0 | meters (m) | Length of each side of the pentagon. |
| DURATION | Value input | 1 | 0.1 to 10 | seconds (s) | Time period (s) |
| FACE_DIRECTION | Bool | True | – | – | Heading behavior |
Returns: None.

Face flight direction
litewing_face_direction

This value block chooses whether the drone should point in its direction of travel during a shape path. Select True when the flight path should guide the drone’s heading and False when it does not need that behaviour.
face_direction=True or face_direction=False| Parameter | Type | Default | Range | Description |
|---|---|---|---|---|
| FACE_DIRECTION | Bool | True | True / False | Heading behavior |
Returns: a navigation parameter for a compatible shape block.
Sensors Commands
Sensor blocks read telemetry from the connected drone. Telemetry is a stream of measurements sent from LiteWing to the app. A sensor reporter can be printed, stored in a variable, or used in a Logic comparison to make the program respond to what the drone measures.
Battery voltage
litewing_get_battery

This reporter block reads the current battery voltage. It is an important safety value because a low 1S LiPo battery can reduce flight performance and should be charged before flight.
Parameters: none.
drone.batteryReturns: a float in volts.
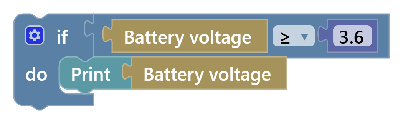
Height sensor
litewing_get_height

This reporter block reads the current estimated height in metres. The value is based on the available position module height sensing and is especially useful for observing a hover or explaining how a condition can use real sensor data.
Parameters: none.
drone.heightReturns: a float in metres.
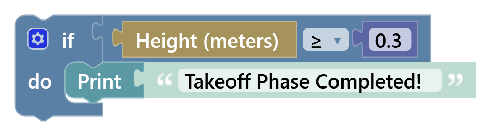
Position sensor
litewing_get_position
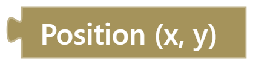
This reporter block reads the estimated X and Y position relative to the launch point. The values are estimates, not a GPS location, and they depend on optical-flow tracking over a textured, well-lit surface.
Parameters: none.
drone.positionReturns: a position value containing X and Y coordinates.
Print sensor
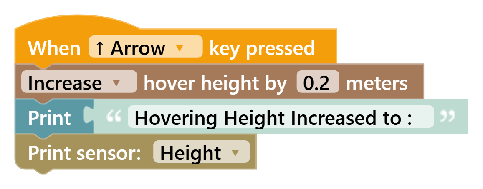
litewing_print_sensor

This block prints a selected telemetry value in the console. It is the simplest way to see a live value while testing a connection, a sensor, or a short flight program.
Parameters: Battery, Height, Position, or Velocity.
print(f"sensor: {drone.sensor}")Returns: None.
Logging Commands
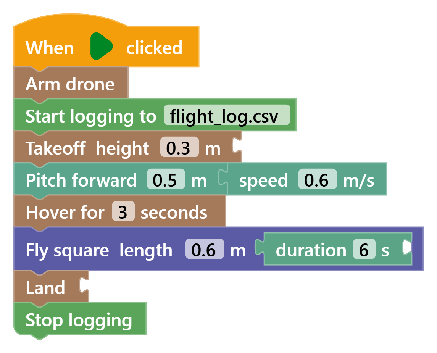
Start logging
litewing_start_logging

This block starts recording available telemetry data into a CSV file. A CSV file can be opened later in a spreadsheet or data-analysis program.
Telemetry logging is useful for capturing flight data that can be reviewed after the flight. Start logging before the commands or flight sequence you want to analyze, and stop logging after the drone has landed.
Parameters: Battery, Height, Position, or Velocity.
drone.start_logging("filename.csv")Returns: Telemetry Flight data.
Stop logging
litewing_stop_logging

This block stops recording and closes the current CSV file. Always use it after Start logging so the recorded file is finished correctly and can be opened later.
Parameters: Battery, Height, Position, or Velocity.
drone.stop_logging()Returns: Telemetry Flight data.
Utilities Commands
Speed modifier
litewing_speed
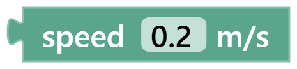
This value block supplies a movement or navigation speed. It does not run by itself, snap it into a compatible speed socket. A lower speed gives the flight controller more time to correct its position.
speed = 0.2 # Navigation speed in m/s| Parameter | Type | Default | Range | Units |
|---|---|---|---|---|
| SPEED | Number field | 0.2 | 0.1 to 2.0 | m/s |
Returns: Output connection (used by compatible movement and navigation blocks).
Duration modifier
litewing_duration
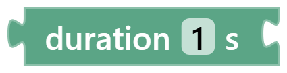
This value block supplies a time to Takeoff, Land, or a shape command. It does not run by itself, snap it into the compatible input socket. With a shape block, duration controls the intended time for completing that path.
duration = 3 # Duration in seconds| Parameter | Type | Default | Range | Units | Description |
|---|---|---|---|---|---|
| DURATION | Value input | 1 | 0.1 to 10 | seconds (s) | Time period (s) |
Returns: a number that can be used by compatible commands.
Debug mode
litewing_set_debug
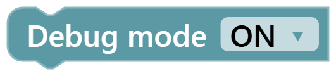
When Debug mode is on, the program can be tested while keeping the propellers inactive.
Debug mode is useful for checking block order, delays, console output, LED sequences, and sensor logic. It is not a flight simulator, It helps verify the program flow.
drone.debug_mode = True or drone.debug_mode = FalseReturns:None.
Wait (Sleep)
litewing_wait

This block pauses the program for a selected number of seconds. It is useful when a program needs to leave time between visible actions, such as changing an LED colour or fetching sensor value and clearing it later.
Parameters: 0.1 s to 60 s in 0.1-second steps.
time.sleep(seconds)Returns: None.
Print message
litewing_print

This block prints a text message or compatible value in the console. Print is useful for making a program explain what it is doing, for example Starting LED test, Taking off, or Flight complete.
print(value)Parameters: None.
Returns: text or a compatible value block.
Standard programming blocks
The lower part of the toolbox contains standard Blockly categories. These blocks make it possible to add decisions, repetition, calculations, data, variables, and reusable commands to drone programs.
| Category | Blocks available in LiteWing Blockly | Typical use with LiteWing |
|---|---|---|
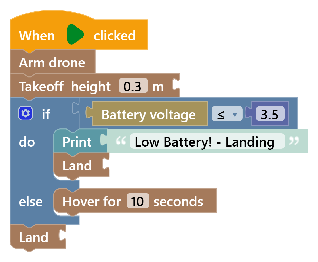
| Logic | if, comparison, and/or, not, true/false | Land if battery voltage is below a safe value. |
| Loops | repeat, while/until, count with | Repeat an LED pattern or a small movement sequence. |
| Math | number, arithmetic, random integer | Calculate a value or choose a random LED colour component. |
| Lists | create list, repeat list item, length, is empty | Store non-flight data or program values. |
| Text | text, join text, print text | Create console messages and labels. |
| Variables | create, set, get, change variable | Store a counter, a target value, or a test result. |
| Functions | define function, call function | Reuse a safe flight routine or LED sequence. |
Standard block reference
| Block | What it does | Python | Inputs and returns | Example use |
|---|---|---|---|---|
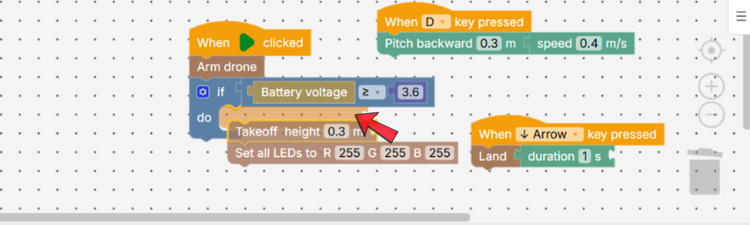
| if / else | Runs one stack when a condition is true and another stack when it is false. | if condition: and optional else: | Takes a true/false condition and statement stacks. Returns nothing. | Land when battery voltage is below 3.5 V. |
| comparison | Compares two values using equals, not equals, less than, greater than, less than or equal to, or greater than or equal to. | For example, drone.battery < 3.5 | Takes two values. Returns True or False. | Compare Battery voltage with 3.5. |
| and / or | Combines two conditions. and needs both conditions to be true, or needs either one to be true. | first and second or first or second | Takes two true/false values. Returns True or False. | Check that the battery is healthy and the height is below a limit. |
| not | Reverses a true/false value. | not condition | Takes one true/false value. Returns True or False. | Use not with a condition that detects a completed task. |
| true / false | Supplies a fixed true or false value. | True or False | No inputs. Returns True or False. | Use it with a condition or an app setting that needs a Boolean value. |
| repeat | Repeat the commands inside it a selected number of times. | for count in range(times): | Takes a number and a statement stack. Returns nothing. | Blink LEDs three times or repeat a short movement routine. |
| while / until | Repeats while a condition remains true, or until a condition becomes true. | while condition: or while not condition: | Takes a condition and a statement stack. Returns nothing. | Keep checking a value during a supervised test. |
| count with | Repeats commands while a variable counts from a start value to an end value. | for number in range(start, end, step): | Takes a variable, start, end, step, and statement stack. Returns nothing. | Run a short sequence five times while counting its steps. |
| number | Supplies a number. | A numeric literal, such as 0.3 | No inputs. Returns a number. | Use it for a height, delay, distance, or comparison value. |
| arithmetic | Adds, subtracts, multiplies, divides, or raises one number by another. | For example, a + b | Take two numbers. Returns a number. | Calculate a new value before printing it. |
| random integer | Selects a whole number between two limits. | random.randint(from, to) | Takes lower and upper limits. Returns a number. | Select a random value for an LED colour component. |
| create list | Creates a list of items. | [item1, item2] | Takes one or more values. Returns a list. | Store non-flight data used by a lesson activity. |
| repeat list item | Creates a list containing the same item a chosen number of times. | [item] * count | Take an item and a count. Returns a list. | Create a repeated data set for a programming exercise. |
| length of list | Counts the items in a list. | len(list) | Take a list. Returns a number. | Check how many stored values are available. |
| list is empty | Checks whether a list contains no items. | not list | Take a list. Returns True or False. | Prevent a program from reading an empty list. |
| text | Supplies text characters. | A quoted string, such as ‘Ready’ | No inputs. Returns text. | Print a message in the console. |
| join text | Combines two or more pieces of text. | A joined string expression | Takes text values. Returns text. | Build a message with a label and a variable value. |
| print text | Displays a text value in the console. | print(text) | Takes text or a compatible value. Returns nothing. | Show Flight complete after land. |
| set variable | Stores a value in a named variable. | name = value | Takes a variable name and a value. Returns nothing. | Store a selected flight count. |
| get variable | Reads the value stored in a variable. | name | No inputs. Returns the stored value. | Use the saved count in a repeat block. |
| change variable by | Increases or decreases a numeric variable. | name += value | Take a variable and a number. Returns nothing. | Count completed LED blink cycles. |
| define function | Creates a reusable named group of commands. | def function_name(): | Takes a function name and a statement stack. Returns nothing until called. | Define a reusable LED-ready sequence. |
| call function | Runs a function created elsewhere in the workspace. | function_name() | Take the selected function name. Returns the function result, if any. | Run the same LED-ready sequence before each supervised test. |
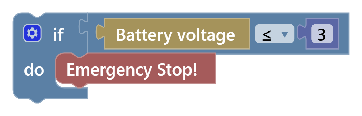
Example: low-battery landing check
The following block idea combines a sensor reporter with standard Logic:
Troubleshooting
| Problem | What to check |
|---|---|
| The app says the drone is not connected | Check that the computer is connected to LiteWing Wi-Fi, confirm the IP address, then select Connect again. |
| Sensors tab has no live values | Confirm that the connection status is green and that the Drone Positioning Module is installed with compatible v3.0.0 or later firmware. |
| LED test does not run | Read the console, check the Wi-Fi connection, and reconnect before running the program again. |
| The drone does not take off | Confirm that the Arm drone comes before Takeoff, Debug mode is OFF, the battery is charged, and the positioning module and compatible firmware are installed. |
| The drone drifts | Use a flat, well-lit, textured floor. Clean the optical-flow sensor area and keep the first movements short. |
| The drone needs to be stopped immediately | Press Spacebar or select Stop. Remember that this cuts motor power and the drone falls. |