
Thermal Imaging Cameras draw the image by detecting the Heat Signatures of that object. You must have seen them in Discovery or National Geography channel, where they used them to take pictures of animals in deep dark. They are also called Night Vision Cameras. But they are very expensive, so here this guy ‘Kaptein QK’ developed a very simpler and much cheaper solution of Thermal Imaging Camera. Of course it is not as good as Professional Cameras but its great in few dollars and its fun to develop it.
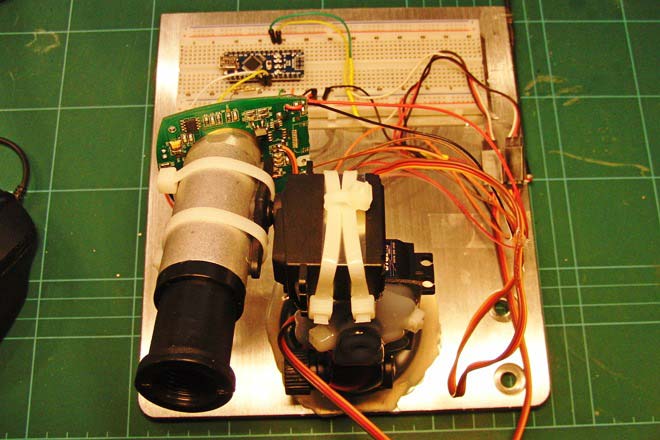
It mainly uses Infrared Temperature Gun or Infrared Thermometer and Arduino Nano. He takes out the circuitry of IR temperature gun from its case to connect it with Arduino Nano. IR gun has a TPS334 thermopile, Op-amp and a ADS1110 AD converter with I2C bus. So Arduino Nano is used to interface AD converter and Pan/Tilt Servos. Pan Tilt servos are used to rotate the IR temperature Gun to the left-right and Up-down. Pan tilt servos basically have two servos and Pan/Tilt Bracket, which makes it able to rotate in all three axes.
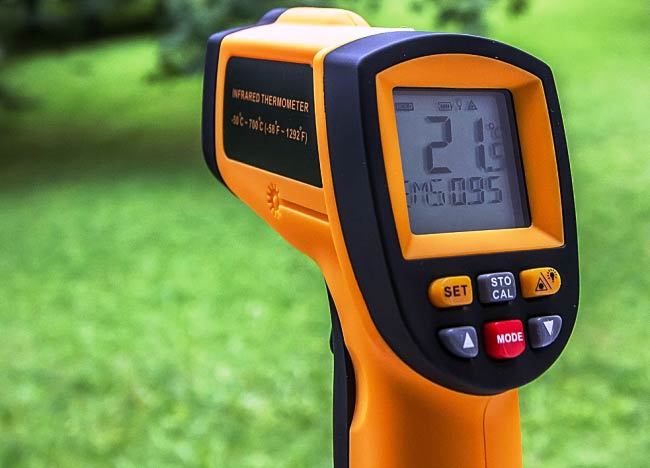
IR Temperature Gun is used to detect the temperature of any distant object. We can point the gun to any object with the help of its Laser beam guidance, and it tells the temperature of that object. It measures the temperature by the amount of IR emitted by that object. Here we have used IR gun of distance-to-spot ratio (D/S Ratio) 50:1. A general Infrared Thermometer is shown below:
So in this Thermal Scanning Camera, IR gun reads the temperature of each pixel and sends it to Arduino, then Arduino further send this data to PC and each pixel is filled with some colour according to the temperature of that pixel, in order to draw the Thermal Image of the object. IR gun is tied to Pan/tilt servos by plastic cable ties, so that IR gun can scan the ‘Area’ with the movement of Servos.
Arduino code is there to rotate the servos and read the temperature serially from IR temperature gum. At the computer side, a ‘Processing’ language program is used to Fill the each pixel with color according to the data sent by Arduino. ‘Processing’ is a Java based programming language built for electronic arts, new media art, and visual design communities. Both the Arduino and Processing Codes are given by ‘Kaptein QK’ in his Scanning Thermal Camera article on EEVblog.
Check out the Video below to see the Action in live and build your own DIY Thermal Imaging Camera. Further its speed can be improved and quality of images can be enhanced by using Colours in images rather than grey colour display.
